Install Olares on LXC
LXC (Linux Containers) is a lightweight virtualization method that runs applications in isolated containers. When used on PVE, it enables an efficient way to deploy Olares without the overhead of a full virtual machine.
System requirements
Make sure your device meets the following requirements.
- CPU: At least 4 cores
- RAM: At least 8GB of available memory
- Storage: At least 64GB of available space (SSD recommended)
- Supported systems:
- PVE 8.2.2
- Linux container: Debian 12 (for existing LXC containers on PVE)
Version compatibility
While the specific versions are confirmed to work, the process may still work on other versions. Adjustments may be necessary depending on your environment. If you meet any issues with these platforms, feel free to raise an issue on GitHub.
Prerequisites
Working directories for storing images and packages on the PVE host. You can set it using the following command:
bashmkdir -p /root/.olares/images /root/.olares/pkgThe container template (CT) for
debian-12-standard_12.7-1_amd64.tar.zst. Download it from the PVE image repository.
Configure the LXC environment
Install on existing LXC
To install Olares on an existing LXC container, skip to step 2 directly. Make sure you use the corresponding container ID.
Create the LXC container using the following script:
Unique container ID
To create a container, you need to assign it a unique container ID. In this guide, we use
16553, but you can replace it with any available numeric ID. Make sure to update all commands and configurations accordingly.bashexport ROOTPASS=123456 pct create 16553 /var/lib/vz/template/cache/debian-12-standard_12.7-1_amd64.tar.zst \ --hostname olares \ --ostype ubuntu \ --cores 4 \ --memory 10240 \ --swap 0 \ --net0 name=eth0,bridge=vmbr0,firewall=1,ip=dhcp,ip6=dhcp,type=veth \ --rootfs local-lvm:80 \ --unprivileged 0 \ --ignore-unpack-errors \ --mp0 "/root/.olares/images,mp=/root/.olares/images" \ --mp1 "/root/.olares/pkg,mp=/root/.olares/pkg" \ --password="$ROOTPASS"Modify the LXC configuration.
a. Open the configuration file using the following command:
bashnano /etc/pve/lxc/16553.confb. Copy and paste the following configurations into the file:
basharch: amd64 cores: 4 hostname: olares memory: 10240 net0: name=eth0,bridge=vmbr0,firewall=1,hwaddr=BC:24:11:13:05:7C,ip=dhcp,ip6=dhcp,type=veth ostype: debian rootfs: local-lvm:vm-16553-disk-0,size=80G # Storage config mp0: /root/.olares/images,mp=/root/.olares/images mp1: /root/.olares/pkg,mp=/root/.olares/pkg # Permision config lxc.apparmor.profile: unconfined lxc.cgroup.devices.allow: a lxc.cap.drop: lxc.mount.auto: "proc sys cgroup:mixed"c. Save and close the file.
Enable IP Virtual Server (IPVS) modules on the PVE host:
bashsudo modprobe ip_vs sudo modprobe ip_vs_rr sudo modprobe ip_vs_wrr sudo modprobe ip_vs_sh sudo modprobe overlayStart the LXC container, make initial configurations, and exit:
bash# Start the container pct start 16553 # Enter the container pct enter 16553 # Create missing directories mkdir -p /lib/modules # Update PATH environment variable echo 'export PATH="/usr/local/bin:$PATH"' >> /root/.bashrc source ~/.bashrc # exit LXC exitCopy PVE dependencies to the LXC container:
bash# Copy kernel config from PVE host to LXC container pct push 16553 /boot/config-$(uname -r) /boot/config-$(uname -r) # Package and copy kernel modules directory tar cvf /lib/modules/6.8.4-2-pve.tar.gz /lib/modules/6.8.4-2-pve pct push 16553 /lib/modules/6.8.4-2-pve.tar.gz /lib/modules/6.8.4-2-pve.tar.gz # Extract the archive inside the container pct enter 16553 cd /lib/modules tar xvf /lib/modules/6.8.4-2-pve.tar.gz -C /
Install on LXC
Run the following installation command inside the LXC container:
curl -fsSL https://olares.sh | bash -Root user password
During the installation, you may be prompted to enter your root password.
Errors during installation?
If an error occurs during installation, use the following command to uninstall first:
bash olares-uninstall.shAfter uninstalling, retry the installation by running the original installation command.
Prepare Wizard URL
At the end of the installation process, you will be prompted to enter your domain name and Olares ID.
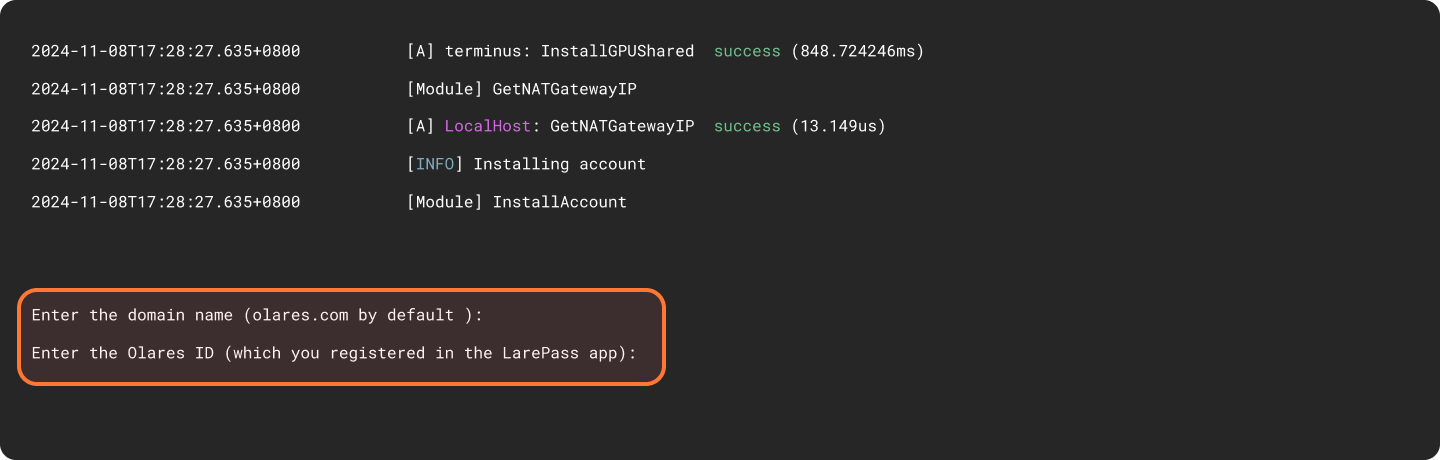
For example, if your full Olares ID is alice123@olares.com:
- Domain name: Press
Enterto use the default domain name or typeolares.com. - Olares ID: Enter the prefix of your Olares ID. In this example, enter
alice123.
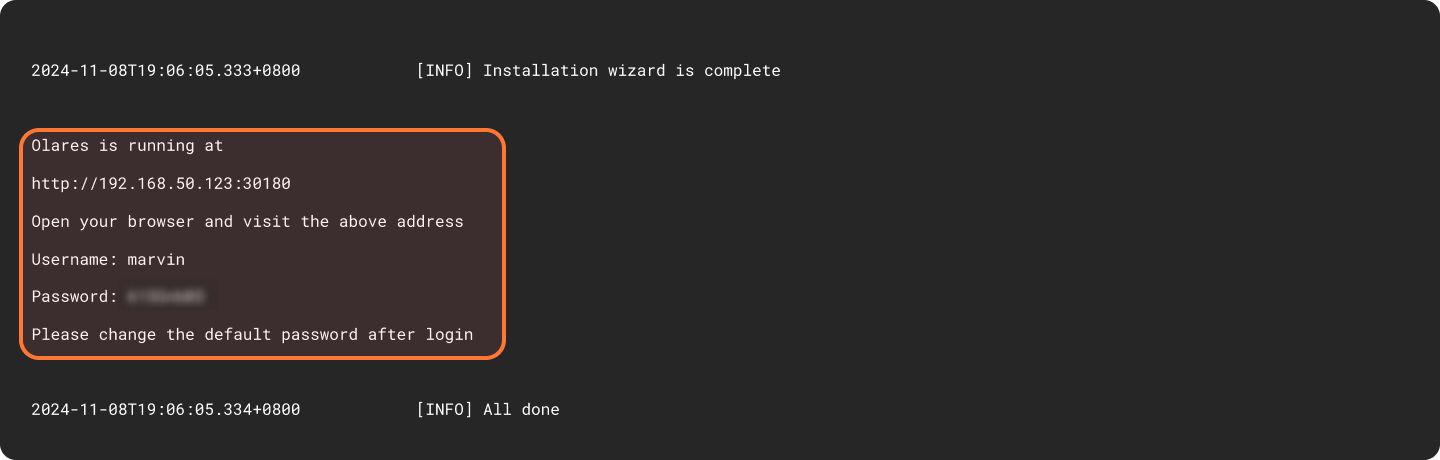
Upon completion of the installation, the initial system information, including the Wizard URL and the initial login password, will appear on the screen. You will need them later in the activation stage.
Activate Olares
Use the Wizard URL and initial one-time password to activate. This process connects the Olares device with your Olares ID using LarePass.
Enter the Wizard URL in your browser. You will be directed to the welcome page. Press any key to continue.

Enter the one-time password and click Continue.

Select the system language.

Activate Olares using LarePass app.
a. Open LarePass app, and tap Scan QR code to scan the QR code on the Wizard page and complete the activation.
Same network required
To avoid activation failures, ensure that both your phone and the Olares device are connected to the same network.

b. Reset the login password for Olares by following the on-screen instructions on LarePass.
Reactivate Olares with the same Olares ID
If you have reinstalled Olares, the original instance becomes unavailable. To reactivate Olares with the same Olares ID:
- Open LarePass on your phone, and you can see a red prompt: "No active Olares found".
- Tap Learn more, then Reactivate to enter the QR scan page.
- Tap Scan QR code to scan the QR code on the wizard page and activate Olares.
After successful setup, the LarePass app will automatically go to the home screen, and the Wizard will redirect you to the login page.
Log in to Olares
Enter the Olares desktop address in your browser, and press any key to continue.
On the login page, enter your Olares login password.

You will be prompted to complete the two-factor verification. You can confirm login on LarePass, or manually enter the 6-digit verification code.
INFO
The verification code is time-sensitive. Ensure you enter it before it expires. If it does, you will need to generate a new code.

Once you've logged in, you'll be directed to the Olares desktop.🎉
Next step: Protect your Olares ID
You're almost ready to start using Olares! Before diving in, it's crucial to ensure your Olares ID is securely backed up. Without this step, you won't be able to recover Olares ID if needed.