Set up a custom domain for your Olares
By default, when you create an account in LarePass, you get an Olares ID with the olares.com domain. This means you access your Olares services through URLs like desktop.{your-username}.olares.com. While this default setup saves you from common network and domain configuration hassles, you might want use your own domain instead, especially in these common scenarios:
- As an organization: Use a company domain similar to your organizational email address for all team members, for example,
employee@company.com. - As an individual: Use your personal domain for a more personalized experience.
This tutorial walks you through setting up your own domain for your Olares.
Objectives
In this tutorial, you will learn how to:
- Add and verify your custom domain in Olares Space
- Create an organization to manage your custom domain
- Configure member access for your organization
- Create an Olares ID under your custom domain
- Install and activate Olares with your Olares ID
How custom domains work in Olares
Custom domains in Olares are managed through organizations. This means whether you're an individual user or representing a company, you'll need to set up an organization first. The organization serves as the container for your custom domain configuration.
The table below outlines the steps involved in setting up a custom domain and who is responsible for each task. Depending on whether you're an individual user or part of an organization, the actions you need to perform will differ.
| Step | Individual user | Organization admin | Organization member |
|---|---|---|---|
| Create a DID | ✅ | ✅ | ✅ |
| Add domain to Olares Space | ✅ | ✅ | |
| Create organization for the domain | ✅ | ✅ | |
| Add email to the organization | ✅ | ✅ | |
| Join the organization & create an Olares ID | ✅ | ✅ | ✅ |
| Set up Olares | ✅ | ✅ | ✅ |
Before you begin
Ensure you have:
- A registered domain name from a domain registrar.
- A Gmail or G-Suit account. Currently, only these two formats are supported for organization domain membership.
- LarePass app installed on your phone.
LarePass will be used later to sign in to Olares Space, and to bind your custom domain to Olares ID.
Step 1: Create a DID
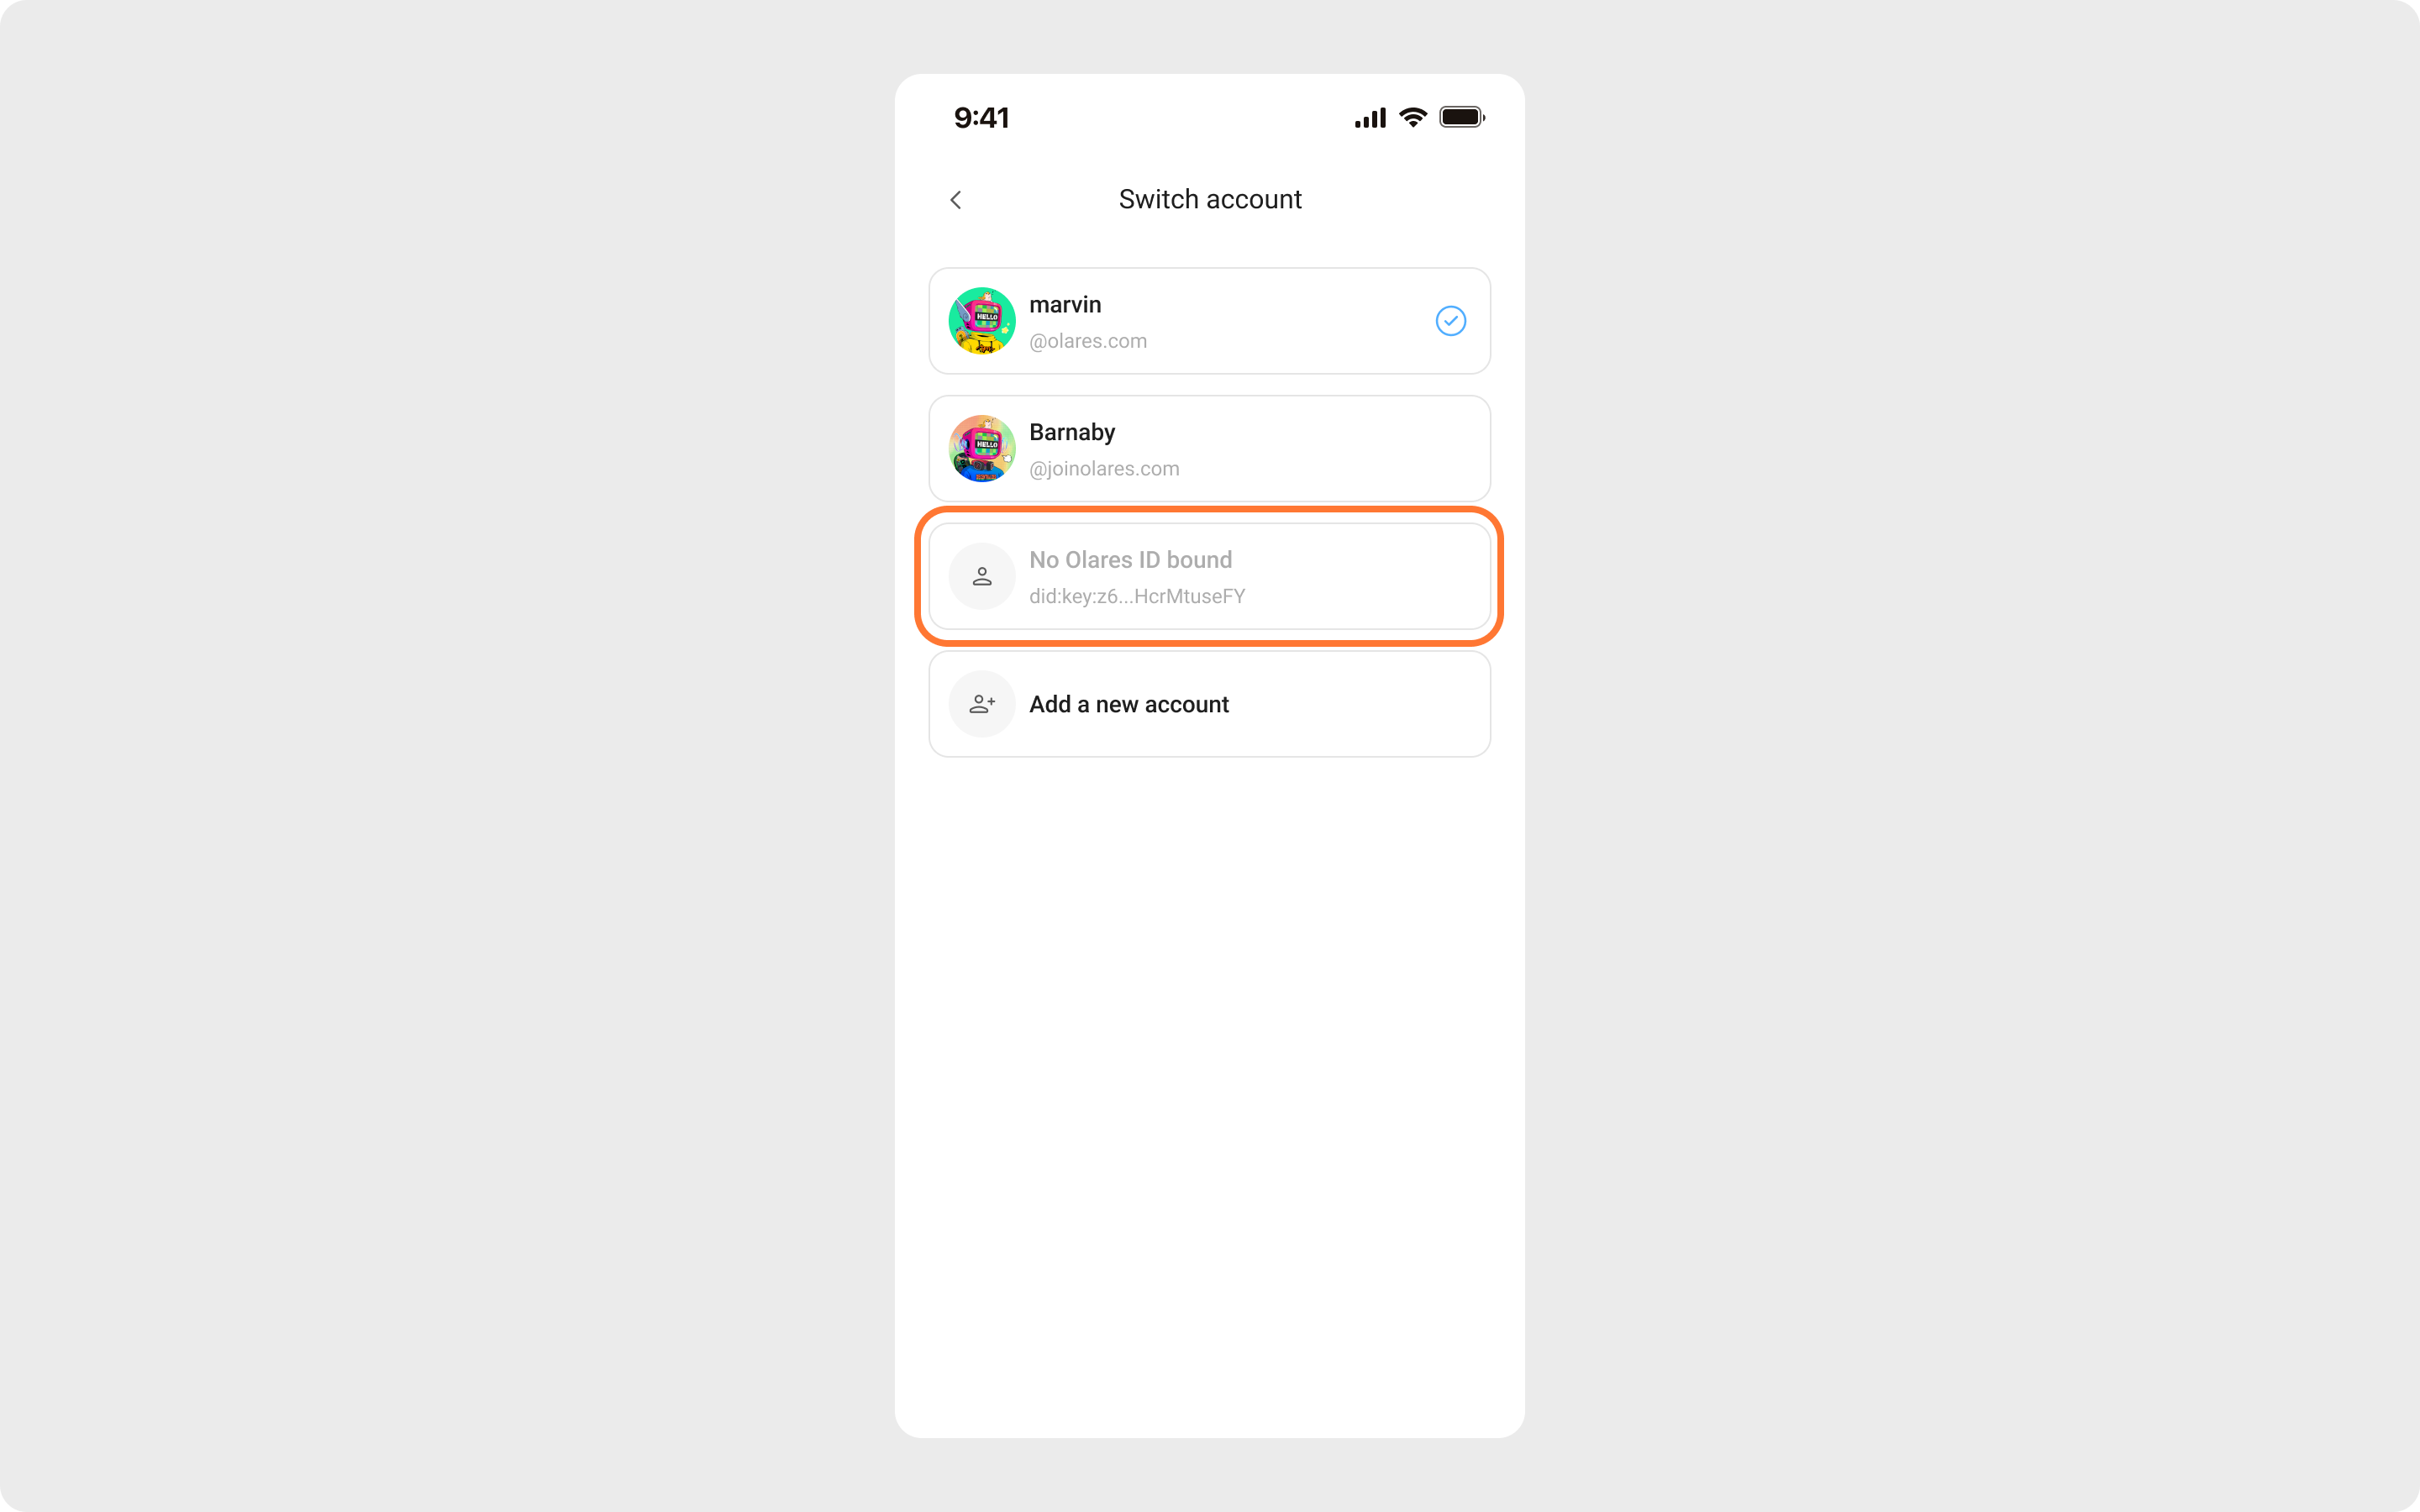
A DID (Decentralized Identifier) is a temporary account state before you get your final Olares ID. You can only bind a custom domain to the account when it is in the DID stage. To create one:
In the LarePass app, go to the account creation page.
Tap Create an account to trigger a DID creation.
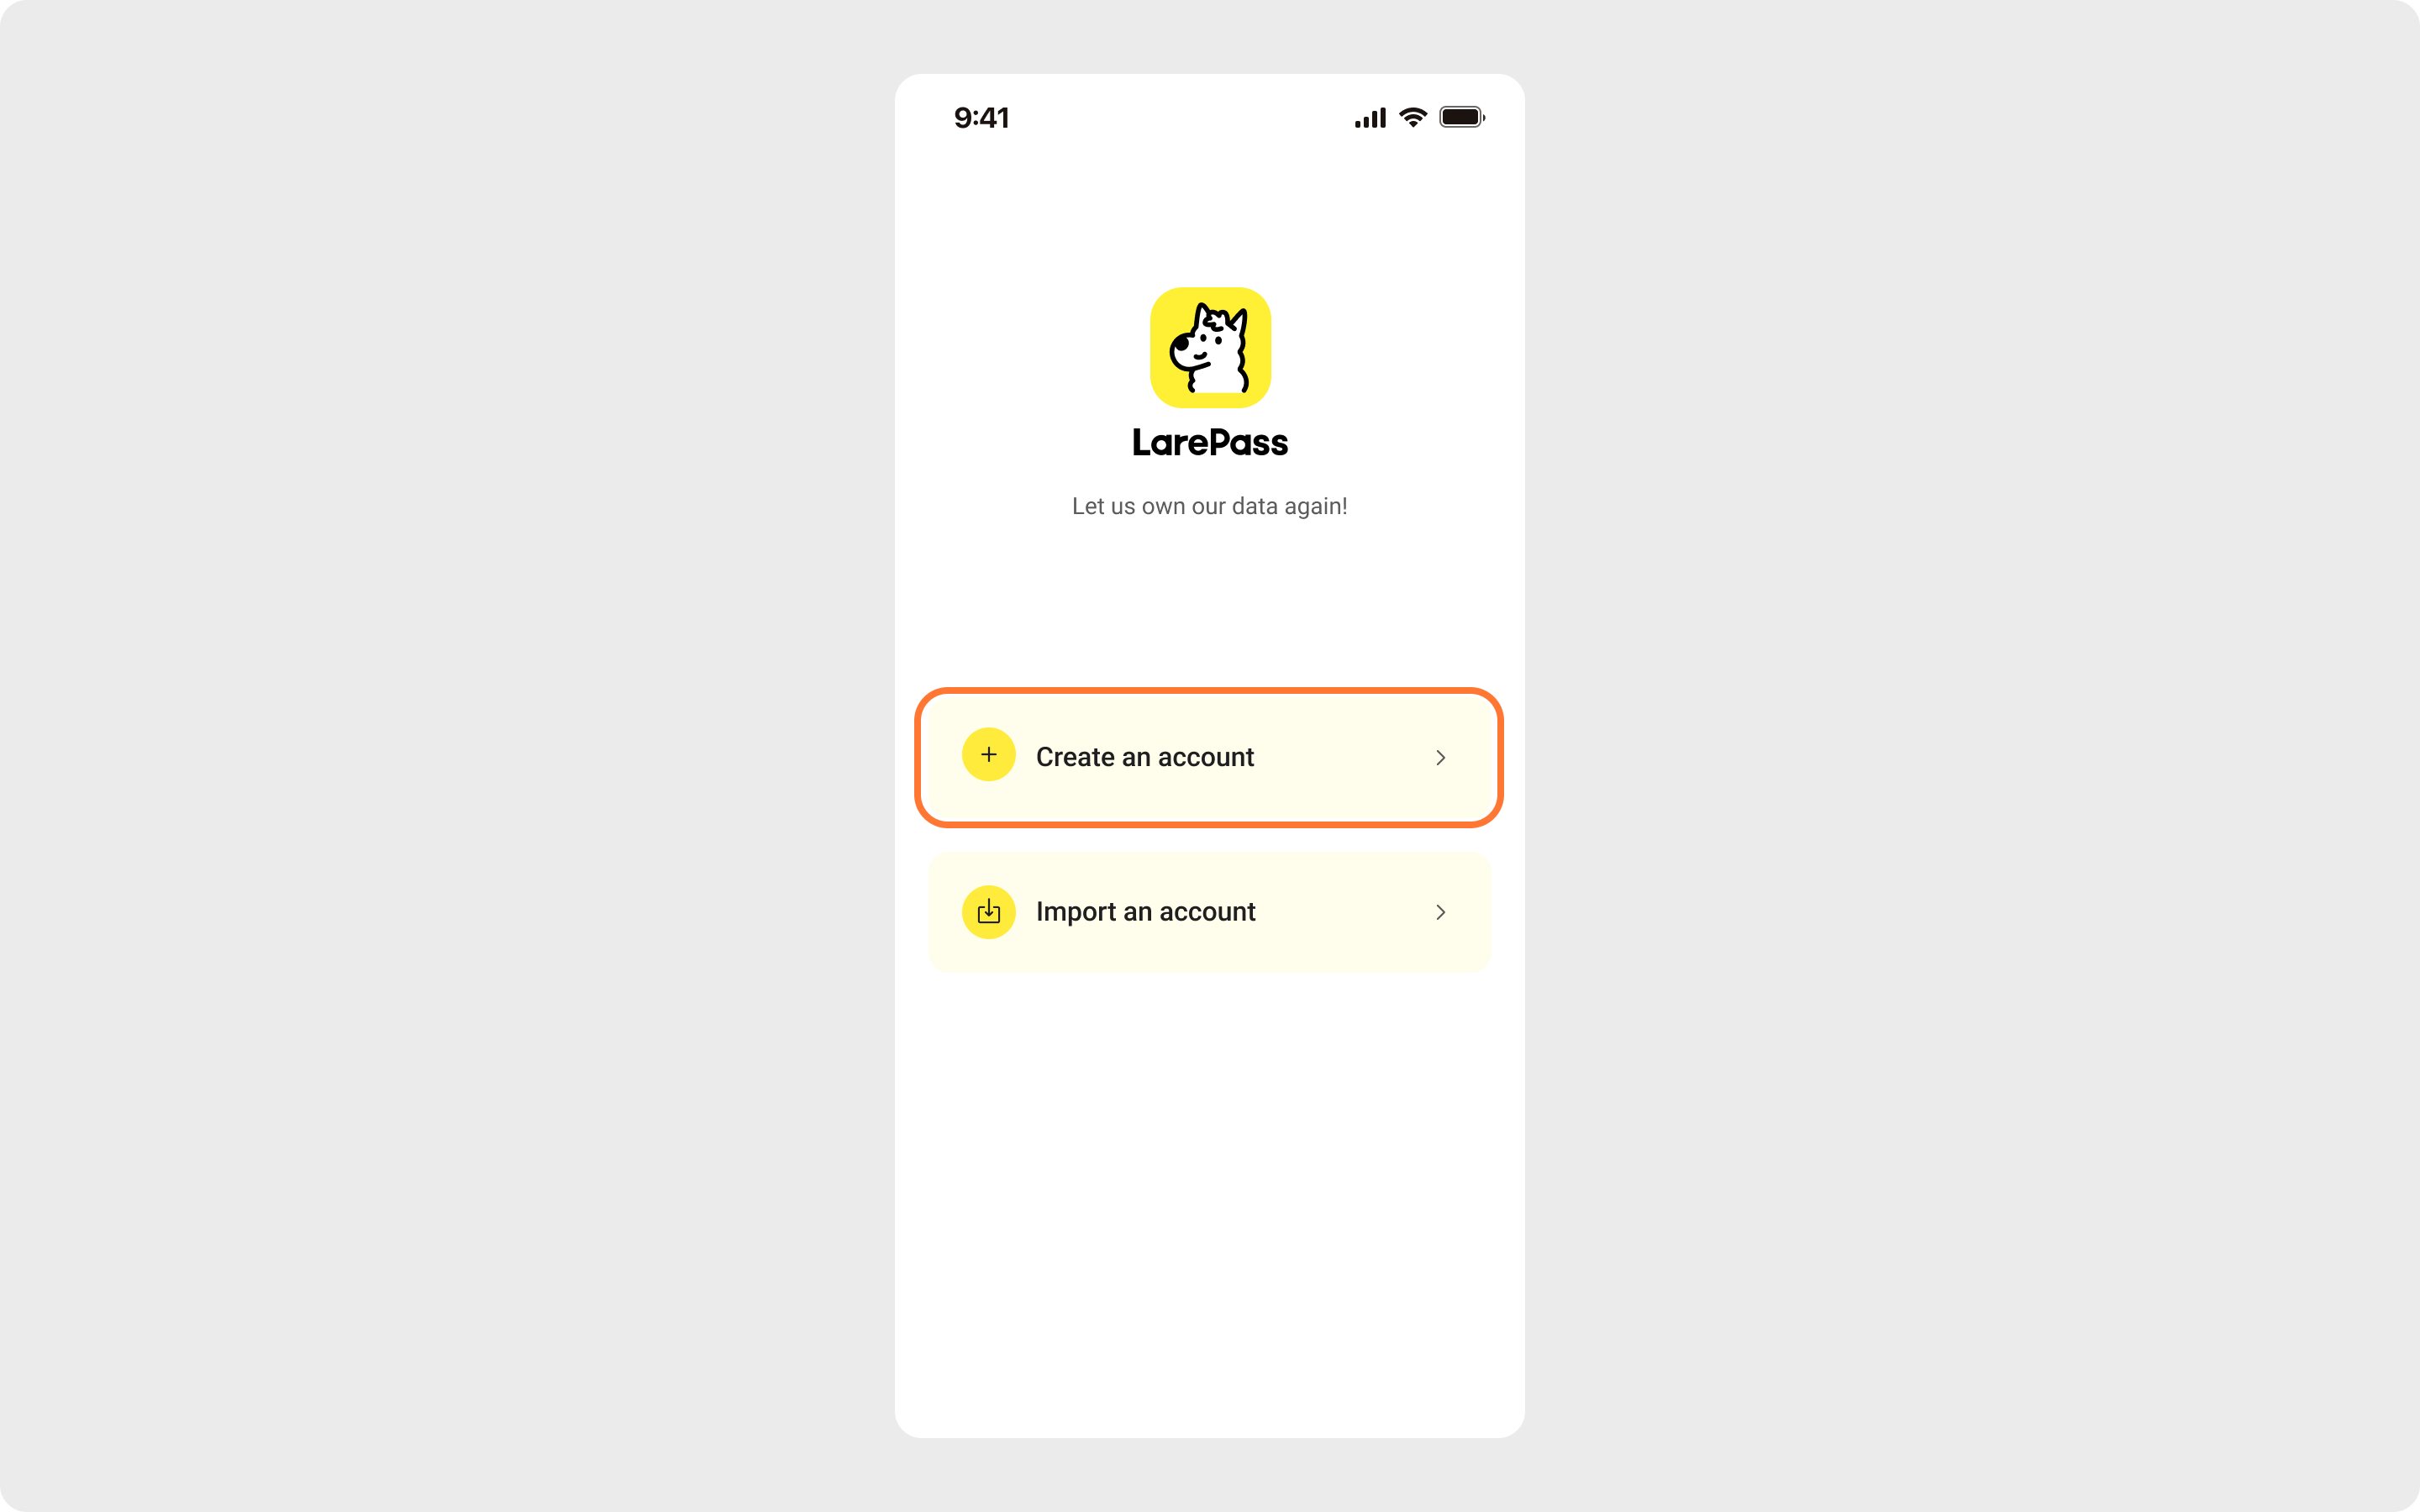
This gets you an Olares account in the DID stage.
Step 2: Add your domain to Olares Space
Add and verify your own domain in Olares Space before binding it.
In your browser, access Olares Space at https://space.olares.xyz/.
In LarePass app, tap the scan button in the top-right corner, and scan the QR code on the login page to log in to Olares Space.

In Olares Space, go to Domain Management > Domain Name Setup, enter your domain and click Confirm.

Verify your TXT record for your domain. This verifies your ownership of the domain.
a. Click Guide in the Action column.
b. Follow the on-screen instructions to add a TXT record to your DNS provider configuration.

Once verified, the domain setup status will update automatically to Await NS Record for Your Domain.
Verify the Name Server (NS) Record for your domain. This delegates the DNS resolution for your domain to Olares's Cloudflare.
a. Click Guide in the Action column.
b. Follow the on-screen instructions to add the NS record to your DNS provider configuration.
Once verified, the domain status will update to Awaiting the application for the domain's Verifiable Credential.

INFO
TXT verification typically completes within 30 minutes. NS record verification may take up to 2 hours. If the whole process exceeds 3 hours, check with your DNS provider.
Once TXT and NS records are verified, your domain is successfully added to Olares Space.
Step 3: Create an org for the domain
This step creates an organization for the domain. Specifically, it binds your domain to an organization in Olares and requests the Verifiable Credential (VC) for the domain.
Verifiable Credential
A Verifiable Credential is a digital format proof that verifies certain attributes or qualifications of its holder without revealing additional personal information.
Create a new organization in LarePass app.
a. On the account creation page, tap display_settings in the top-right corner to go to the Advanced account creation page.
b. Go to Organization Olares ID > Create a new organization. The organization for your domain will automatically show in the list.
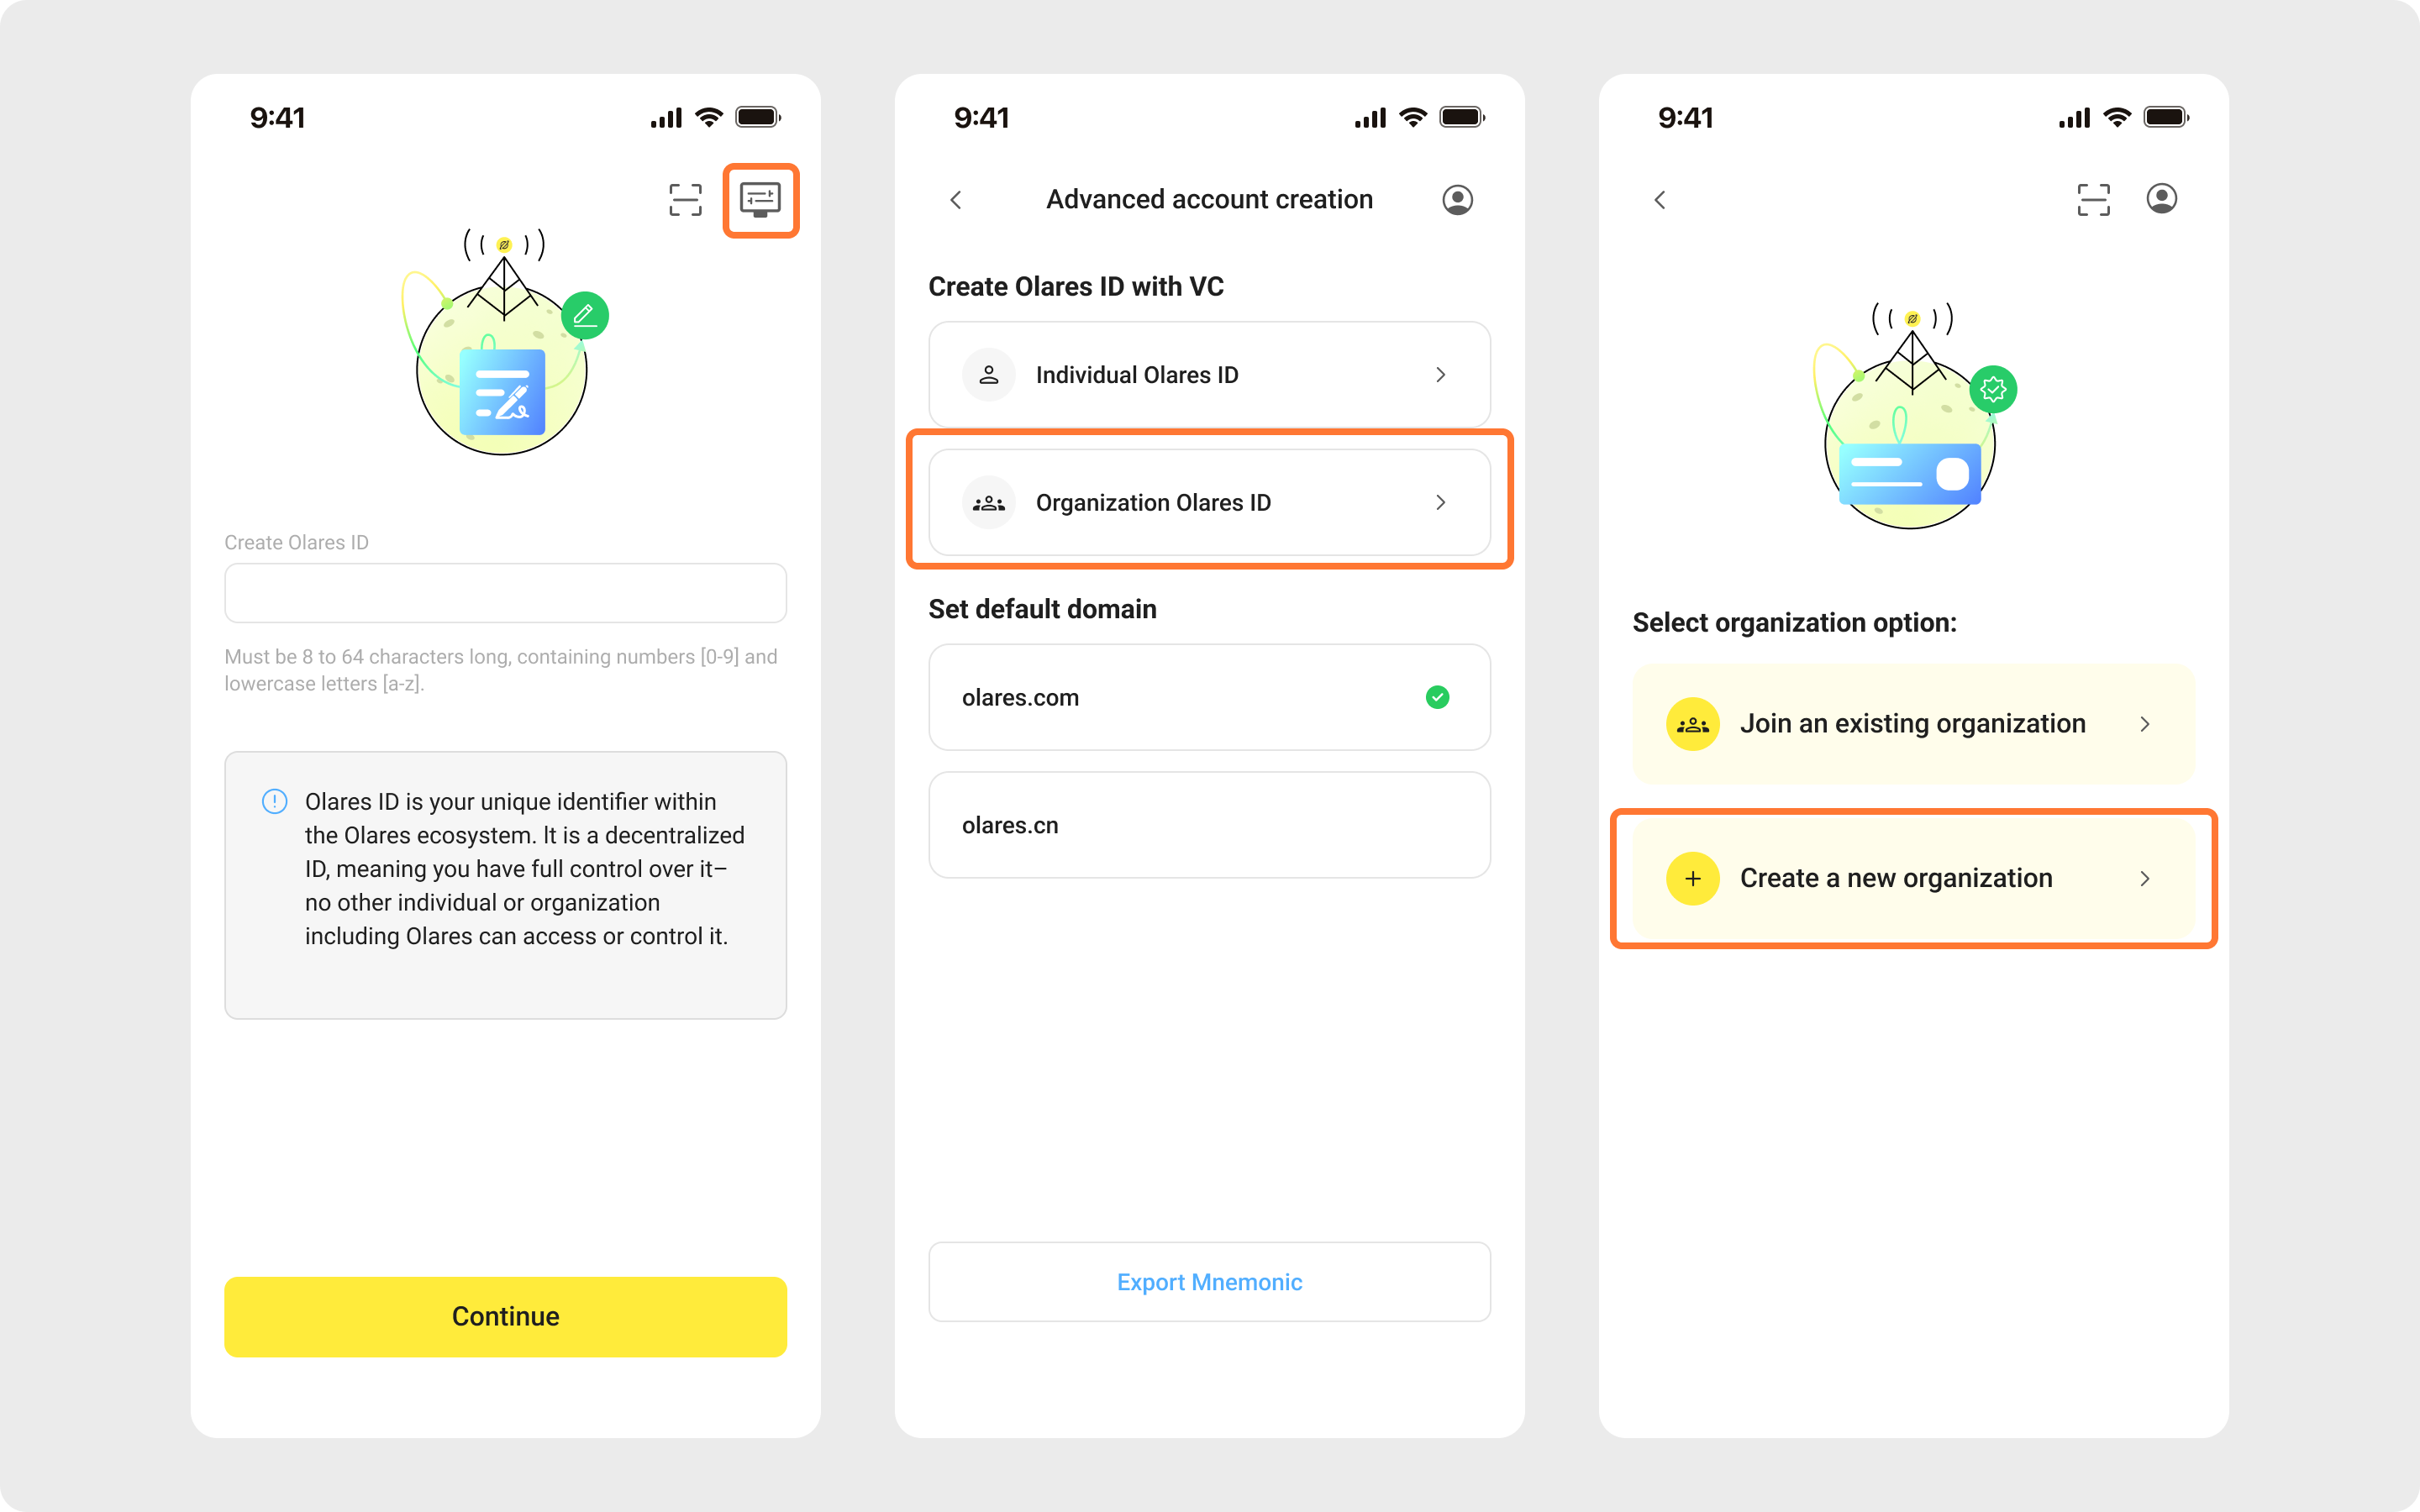
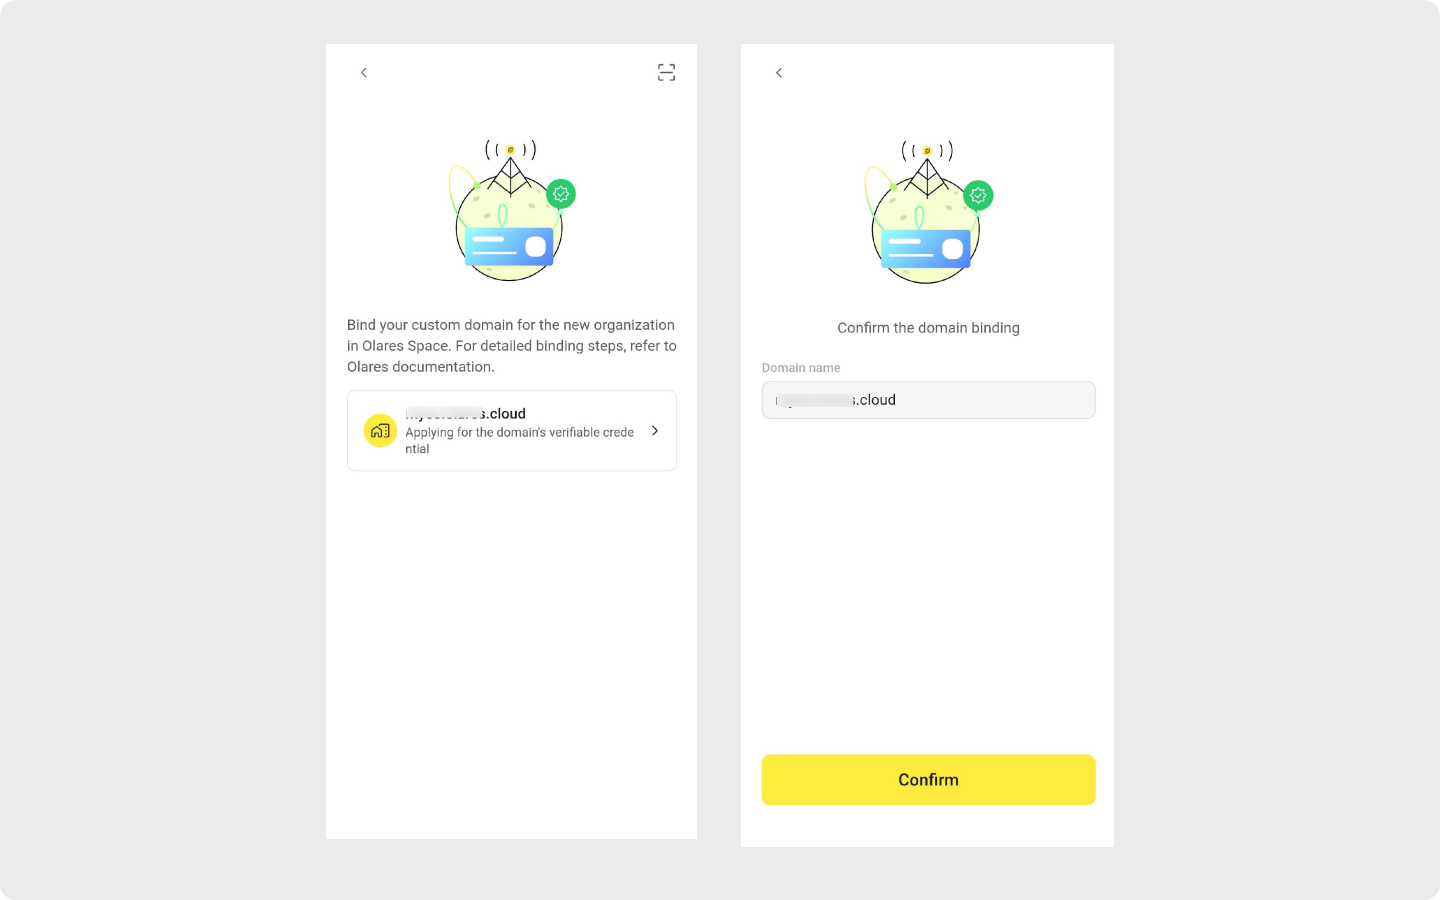
c. Tap the organization name to apply for the VC. When it's done, you will see your domain name for confirmation.
d. Click Confirm to finish the organization domain binding in LarePass.
On Olares Space, navigate to the Domain management page. The domain setup status should change to Awaiting rule configuration.
So far, you have successfully bound your custom domain with an organization, and is set for configuring the domain rules in Olares Space.
Step 4: Add new member
The domain rules specify how you add the members for the organization. Only members in the organization can apply for Olares ID under the organization domain (or, your custom domain). To configure domain rules:
In Olares Space, go to Domain management, and click View next to your domain.
Under Domain Invitation Rule, select Specified email address, and click Save.
Invitation rules
Two types of rules are available:
- Fixed email suffix: Suitable for large teams who share the same corporation email domain (e.g.,
@company.com). Any email matching the specified suffix is valid to apply for Olares ID under the organization. Currently, only single suffix is supported. Must follow G-Suite format. - Specified email address: Allows you to add members by specifying their email addresses. This option is recommended if you do not have a corporate email domain and only need to invite a small number of members to your organization. Both Gmail and G-Suite accounts are supported.
- Fixed email suffix: Suitable for large teams who share the same corporation email domain (e.g.,
Click Add New User and enter the Gmail address for the member. For example,
justtest1953@gmail.com.
Click Submit to finalize the member addition. Repeat step 3 and step 4 if you want to add multiple users
Maintain member list
For organization admin, you can manage your organization's member list anytime through the Domain management page.
Step 5: Create an Olares ID with the custom domain
To use the domain, apply for an Olares ID under the organization.
On the account creation page of LarePass app, tap display_settings in the top-right corner to go to the Advanced account creation page.
Tap Organization Olares ID > Join an existing organization.
Type the org domain name (the verified custom domain) and click Continue. If you see an error, verify if the domain name is correct and the domain rules are set properly in Olares Space.
Add a VC for the member.
a. When prompted, select Google as your VC credential provider.
b. Log in with the Gmail account you added in the previous step and grant access for VC.
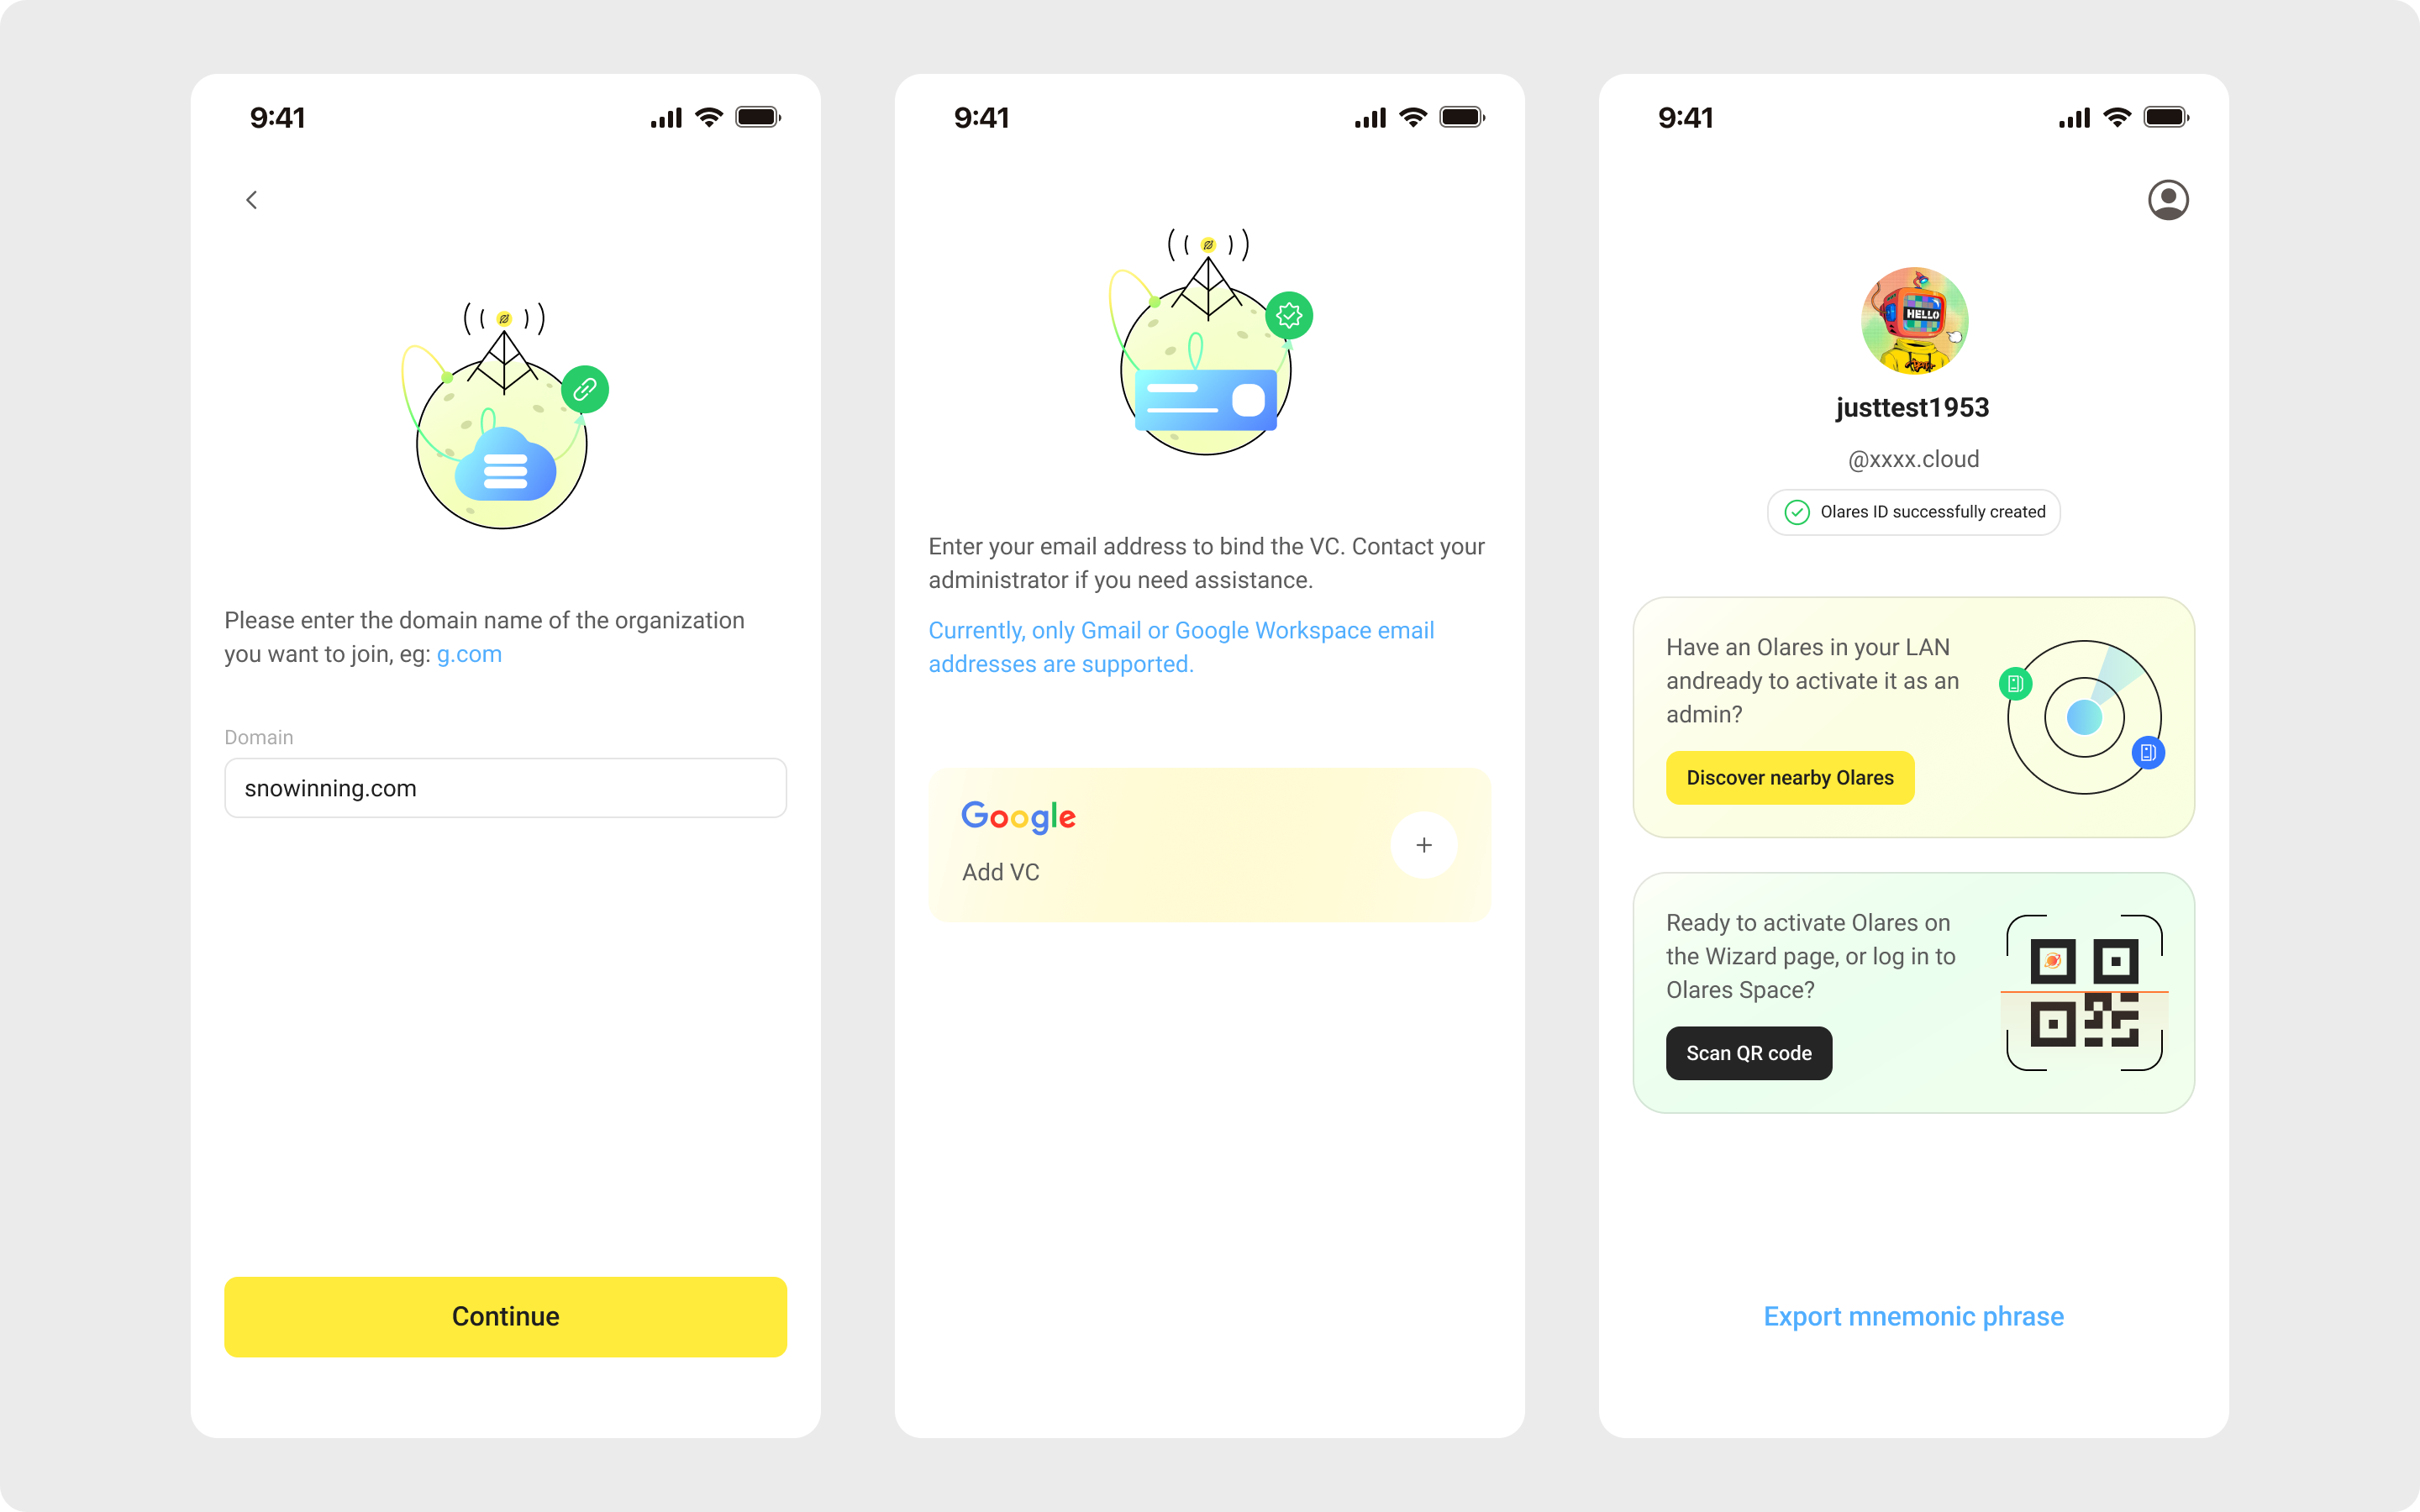
After successful authorization, an Olares ID with the custom domain, justtest1953@xxxx.cloud, is successfully created.
Step 6: Install and activate Olares
Almost there! Now you are all set to install and activate Olares with your Olares ID.
Install with environment variables
In the following examples, the domain name and username are preset with environment variables.
For Linux environment, you can also install with the one-line script without these variables, and enter the domain and the prefix of Olares ID manually.
For detailed instructions on all supported platforms, refer to platform-specific installation guides.
After completing these steps, your Olares installation will be accessible via your custom domain.