Customize application URLs
You can access Olares applications anytime, anywhere, whether you're accessing from local or remotely. This guide will help you:
- Personalize domain name for your applications
- Allow public access without authentication
Before you begin
Before you start, it is recommended to familiarize yourself with a few concepts for Olares applications:
Customize domain name for application
Olares provides two methods to optimize application access addresses:
- Custom route ID
- Custom domain name
Custom route ID
Route ID is a crucial component in accessing your Olares applications. It forms part of the URL you use to reach your applications through a web browser:
https://{routeID}.local.{OlaresDomainName}
INFO
local in a URL signifies a private access point, typically used by apps offering services for individual users, families, or teams. Public-facing apps hosting external services do not include local in their URLs. For more details, see entrance.
For convenience, Olares uses easy-to-remember route IDs for pre-installed system applications. For community applications, you can quickly obtain a simple and memorable URL by changing the route ID. To use Jellyfin as an example:
Open the Settings app, and select Application from the left sidebar.
Click Jellyfin on the right to view application details.
Go to Entrances > Set up endpoint. You can see the default Route ID for Jellyfin, which is a combination of numbers and letters.
Next to Set custom Route ID, click add.
Enter a route ID that is more memorable and recognizable. For example,
jellyfin.
Click Confirm.
Now, you will be able to access Jellyfin from your new URL: https://jellyfin.local.bob.olares.com.
Custom domain name
Instead of using the default Olares domain, you can use your own domain name to access your applications, making them more professional and easier to remember. To use Affine as an example:
INFO
Only applications with the authentication level set to Internal or Public support custom third-party domains.
Open the Settings app, and select Application from the left sidebar.
Click Affine on the right to view application details.
Go to Entrances > Set up endpoint.
Next to Set custom domain, click add.

Enter your custom domain, for example,
hello.coffee, and click Confirm.Click Activation, and follow the instructions to add a CNAME record on your domain hosting site. Then click Confirm.
 At this stage, the custom domain status will display as "Waiting for CNAME Activation". This means you need to wait for the DNS changes to propagate. The propagation time typically ranges from a few minutes to 48 hours, depending on your domain provider.
Olares will periodically check if the DNS record is correctly configured. Once the CNAME record is verified, the custom domain status will automatically update to "Activated". After activation, you can access Affine using the new URL:
hello.coffee.
TIP
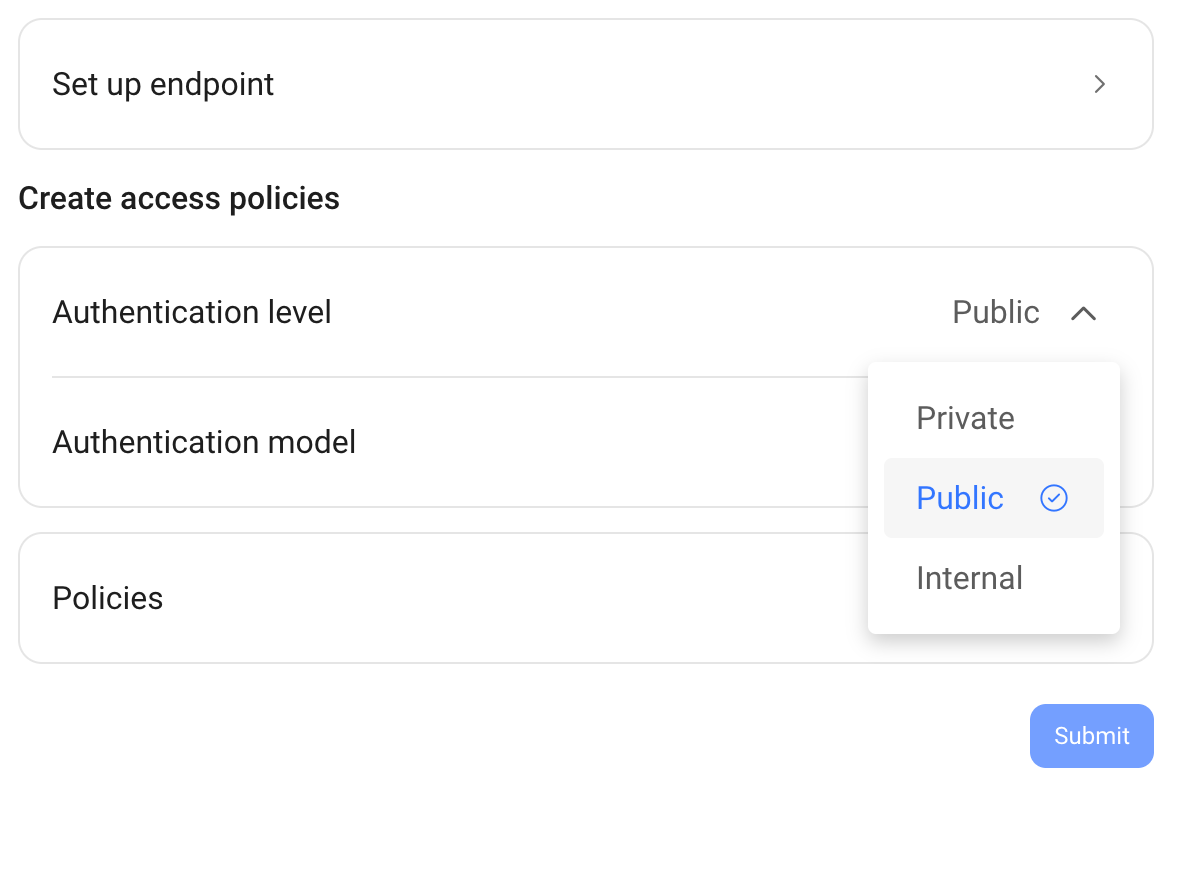
To allow public access to your custom domain without login, update the access policies as below:
Navigate to Settings > Application, and click the target application.
Click Entrance, then under Create access policies, set Authentication level to Public.
Click Submit to apply changes.