AI art creation with ComfyUI and Krita
Create stunning AI-powered artwork by connecting ComfyUI's advanced AI capabilities with Krita's professional digital art tools. This guide shows you how to set up your complete AI art workflow with Olares.
Understanding the components
Your AI art studio consists of three key pieces working together:
- ComfyUI: The AI engine running in your Olares environment that powers image generation.
- Krita: Professional-grade digital art software where you'll create and edit your artwork.
- Krita AI Diffusion Plugin: The connector that enables seamless communication between Krita and ComfyUI.
What you'll need
Before starting, ensure you have:
- A working Olares installation with internet access
- A computer connected to the same local network as Olares
- Sufficient system resources (recommended: 16GB RAM for optimal performance)
Set up ComfyUI
Install ComfyUI from Market based on your role:
- For admin: Install both "ComfyUI For Cluster" and "ComfyUI".
- For team members: Ensure your admin has installed "ComfyUI For Cluster", and install "ComfyUI" only.
Configure ComfyUI.
a. Open Settings, navigate to Applications > ComfyUI > Entrances.
b. Set the Authentication level to Internal.

Launch ComfyUI from your desktop, and verify the installation by generating a sample image.
Copy the address of ComfyUI for next steps.
TIP
For security, you should always run AI applications within your local network. When properly configured, your ComfyUI URL should contain .local.
If .local is missing, check your local network environment and make sure no external network proxy service is enabled.
Set up Krita
- Download Krita.
- Download the Krita AI Diffusion plugin.
- Launch Krita, and navigate to Tools > Scripts > Import Python Plugin from File, and select the downloaded ZIP package.

- Confirm the plugin activation and restart Krita.
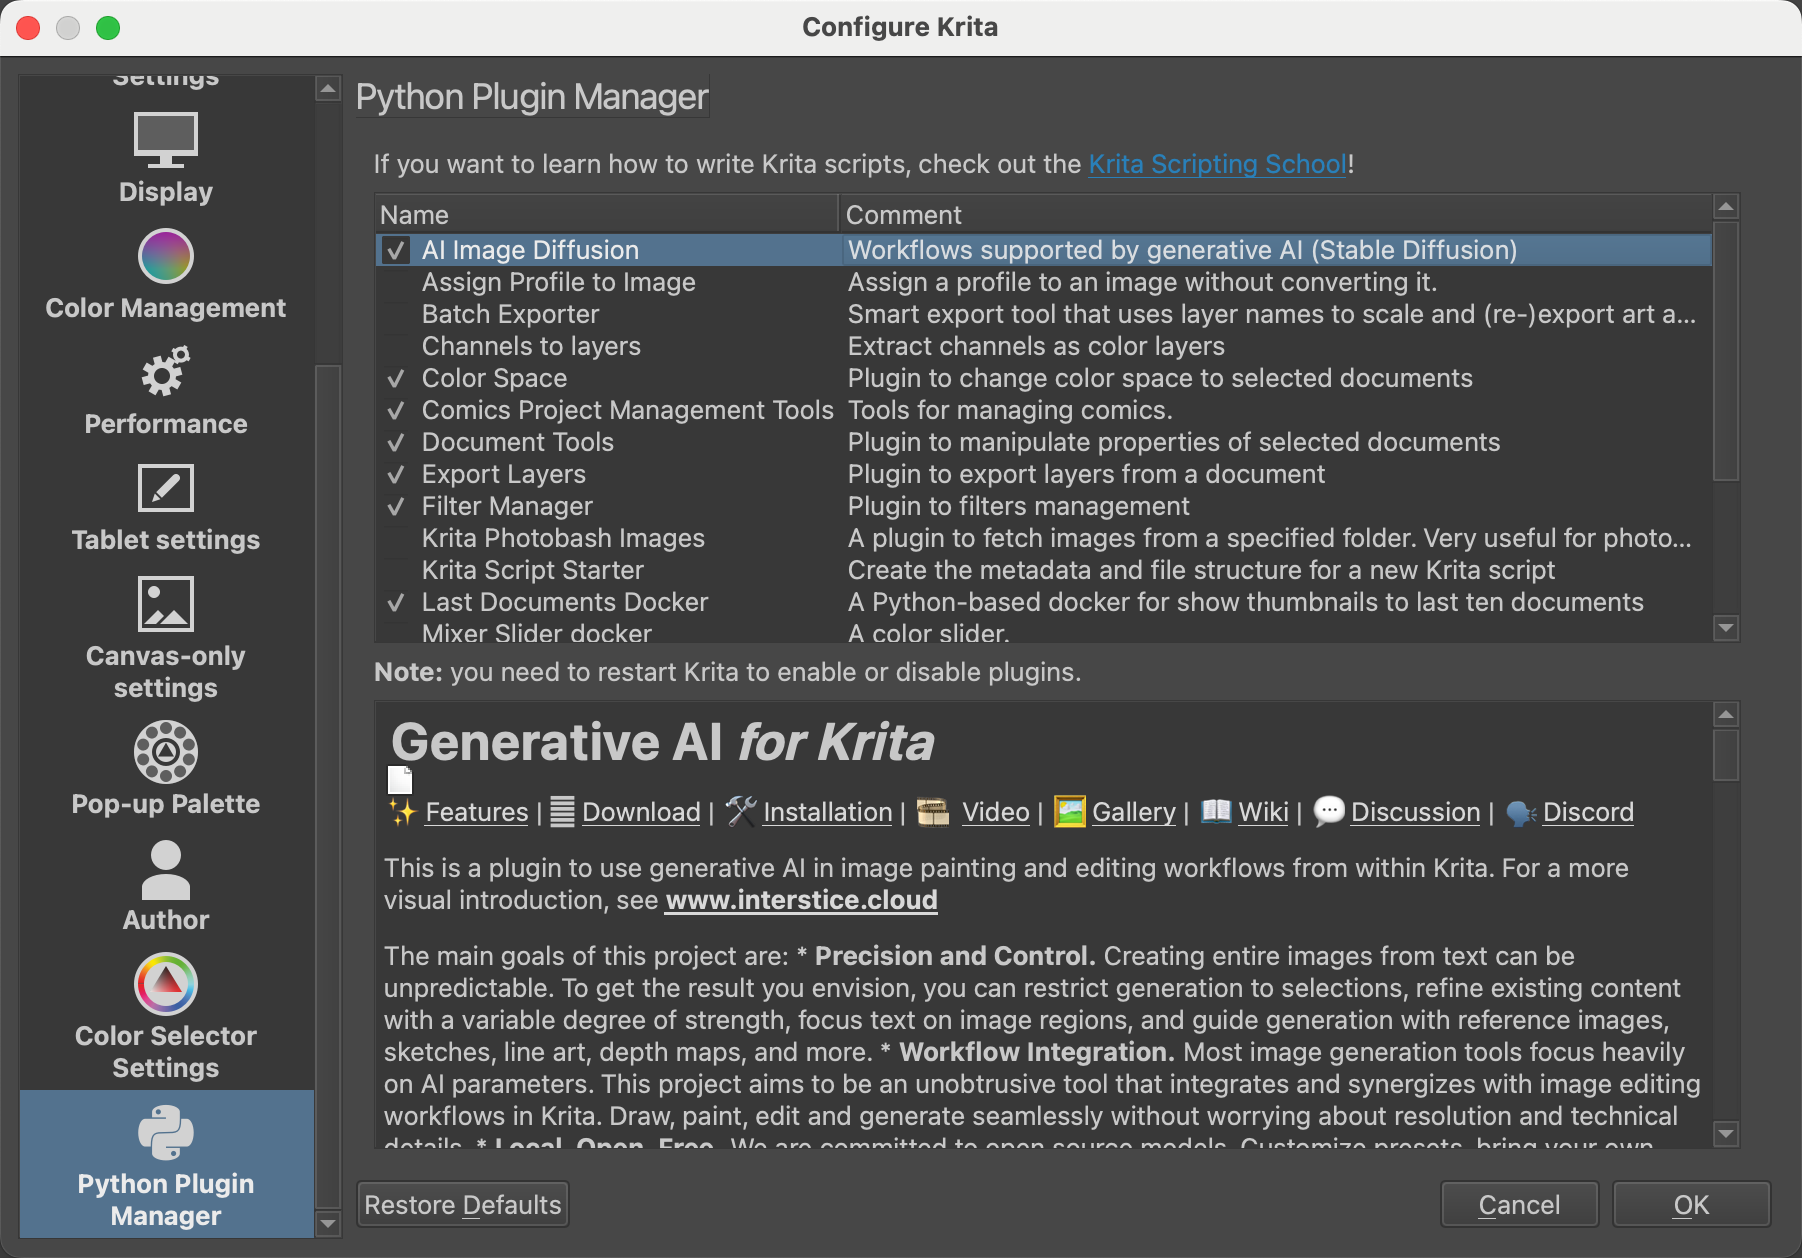
- Open Krita, and verify the installation in Settings > Configure Krita > Python Plugin Manager.

Connect Krita to ComfyUI
Establish a secure connection between Krita and ComfyUI:
Create a new document in Krita.
TIP
Start with a 512 x 512 pixel canvas to optimize performance and manage graphics memory efficiently.
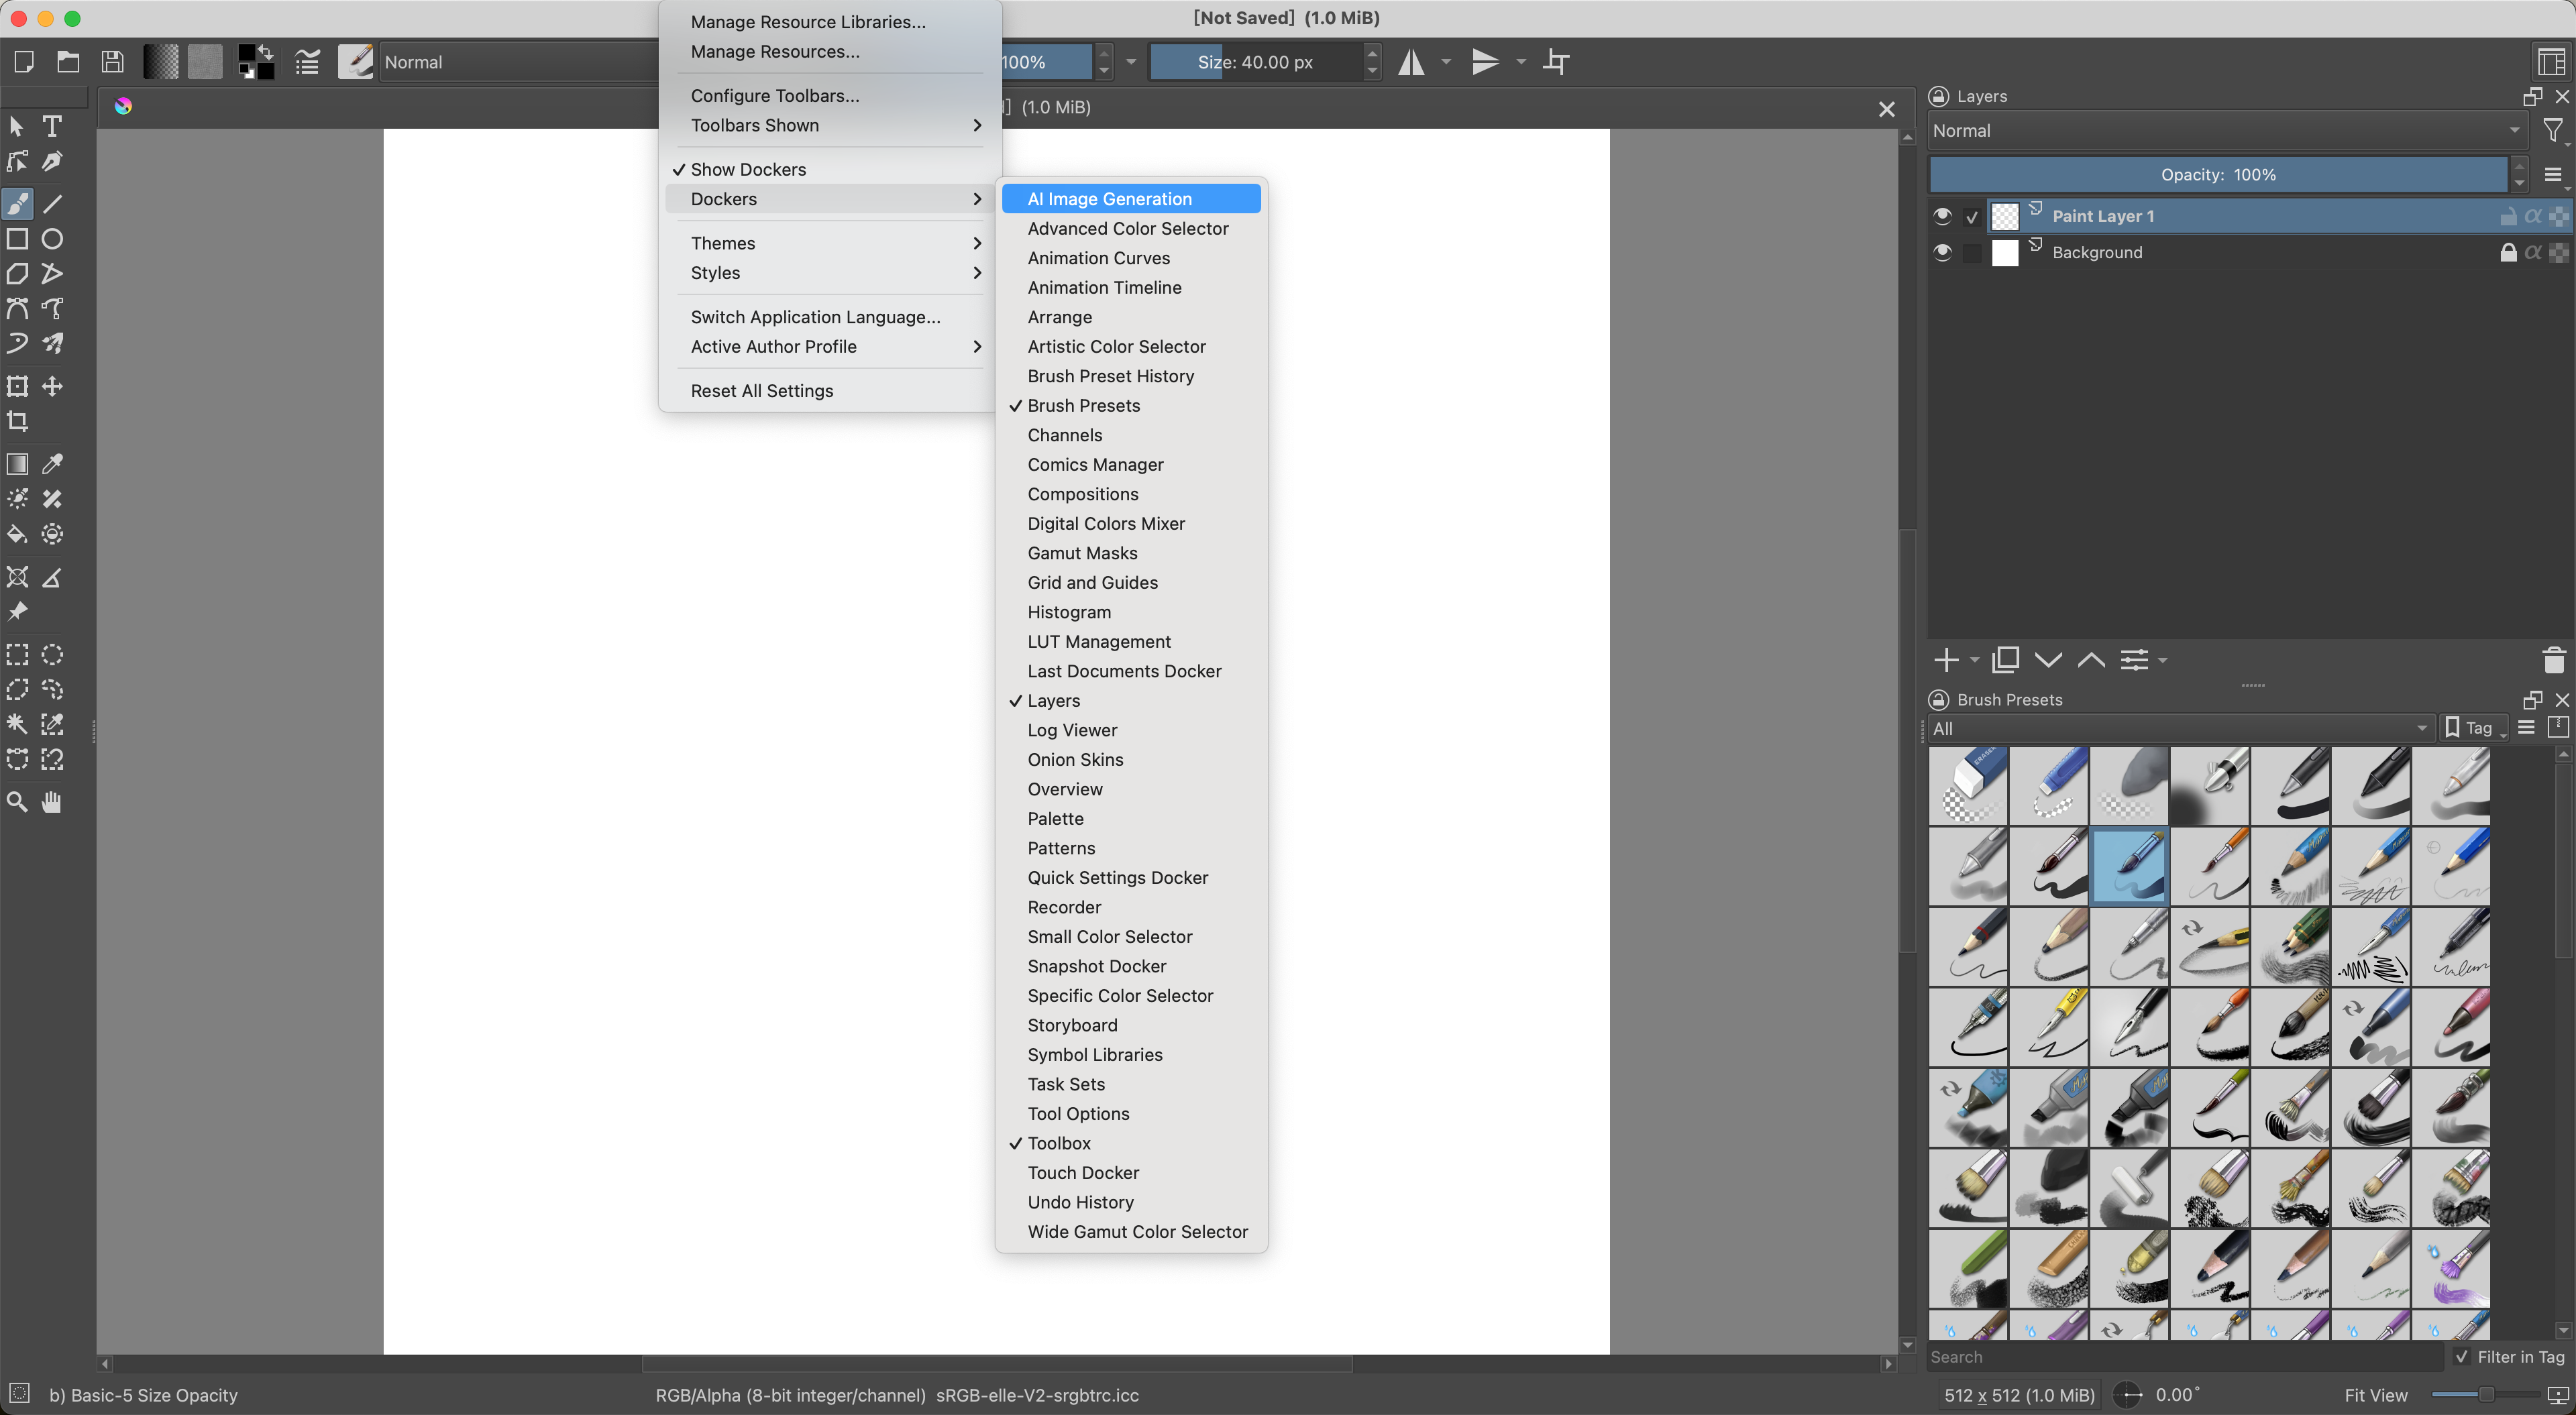
Click Settings > Dockers > AI Image Generation to enable the plugin. You could position the panel to where it's convenient.

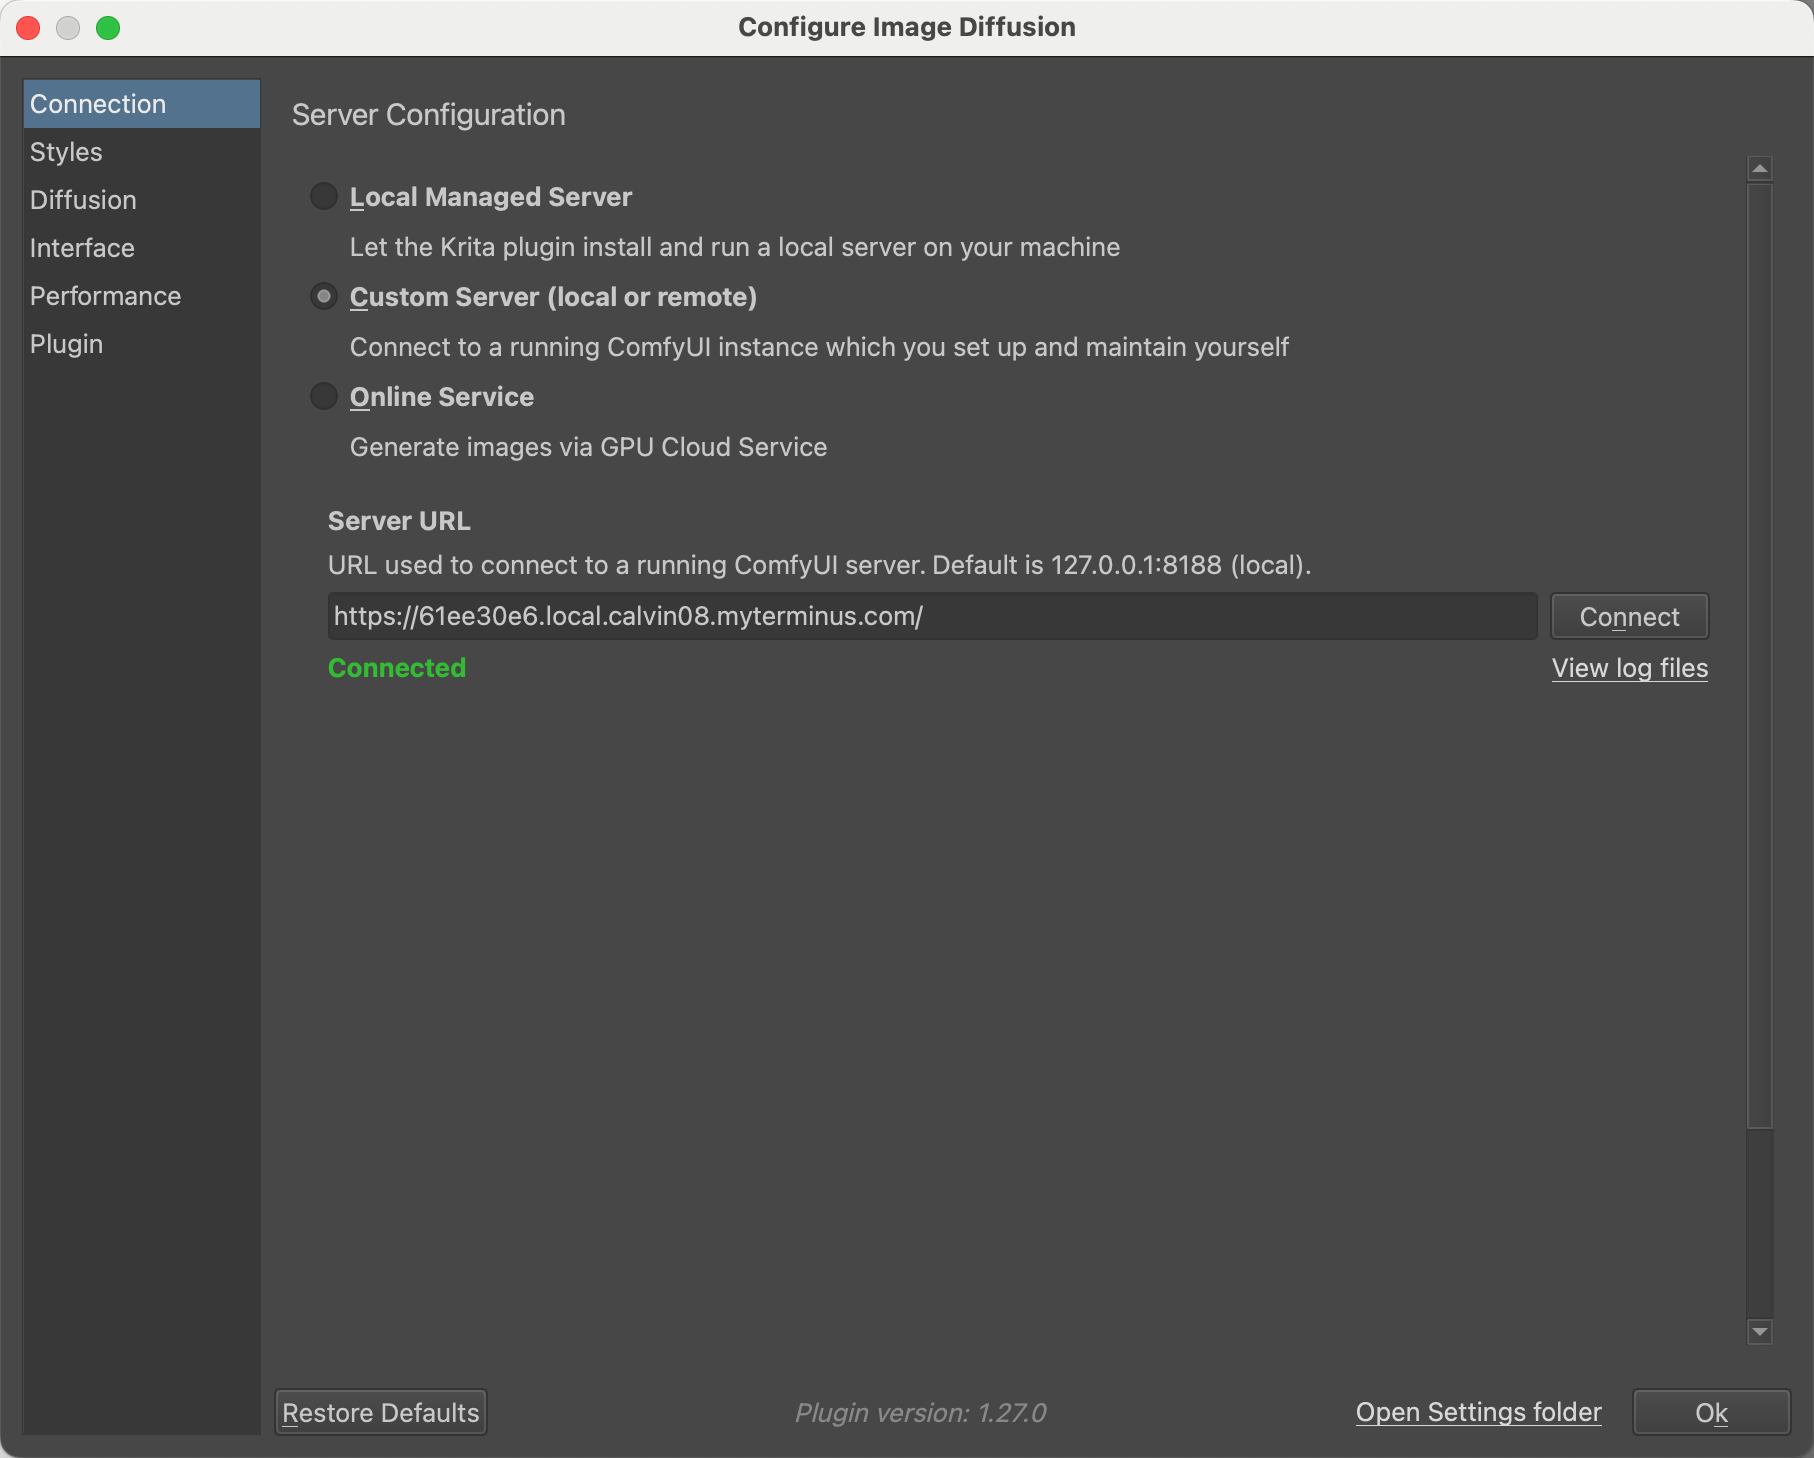
Click Configure to access the plugin settings.

Set up ComfyUI connection.
a. In Connection, select Custom Server, and paste your ComfyUI URL.
b. Click Connect to verify the connection. A green "Connected" indicator confirms successful connection.

INFO
If connection fails:
- Verify network connectivity between your computer and Olares.
- Confirm ComfyUI's authentication level is set to "Internal".
- Check for and disable any interfering proxy services.
- Ensure ComfyUI is running correctly on your Olares.
Adjust ComfyUI settings.
a. In Styles, configure your preferred style templates and select appropriate model checkpoints.
b. Keep default values for other settings unless you need specific optimizations.
Create AI art with text prompts
Now comes the exciting part - creating AI-generated artwork using natural language prompts.
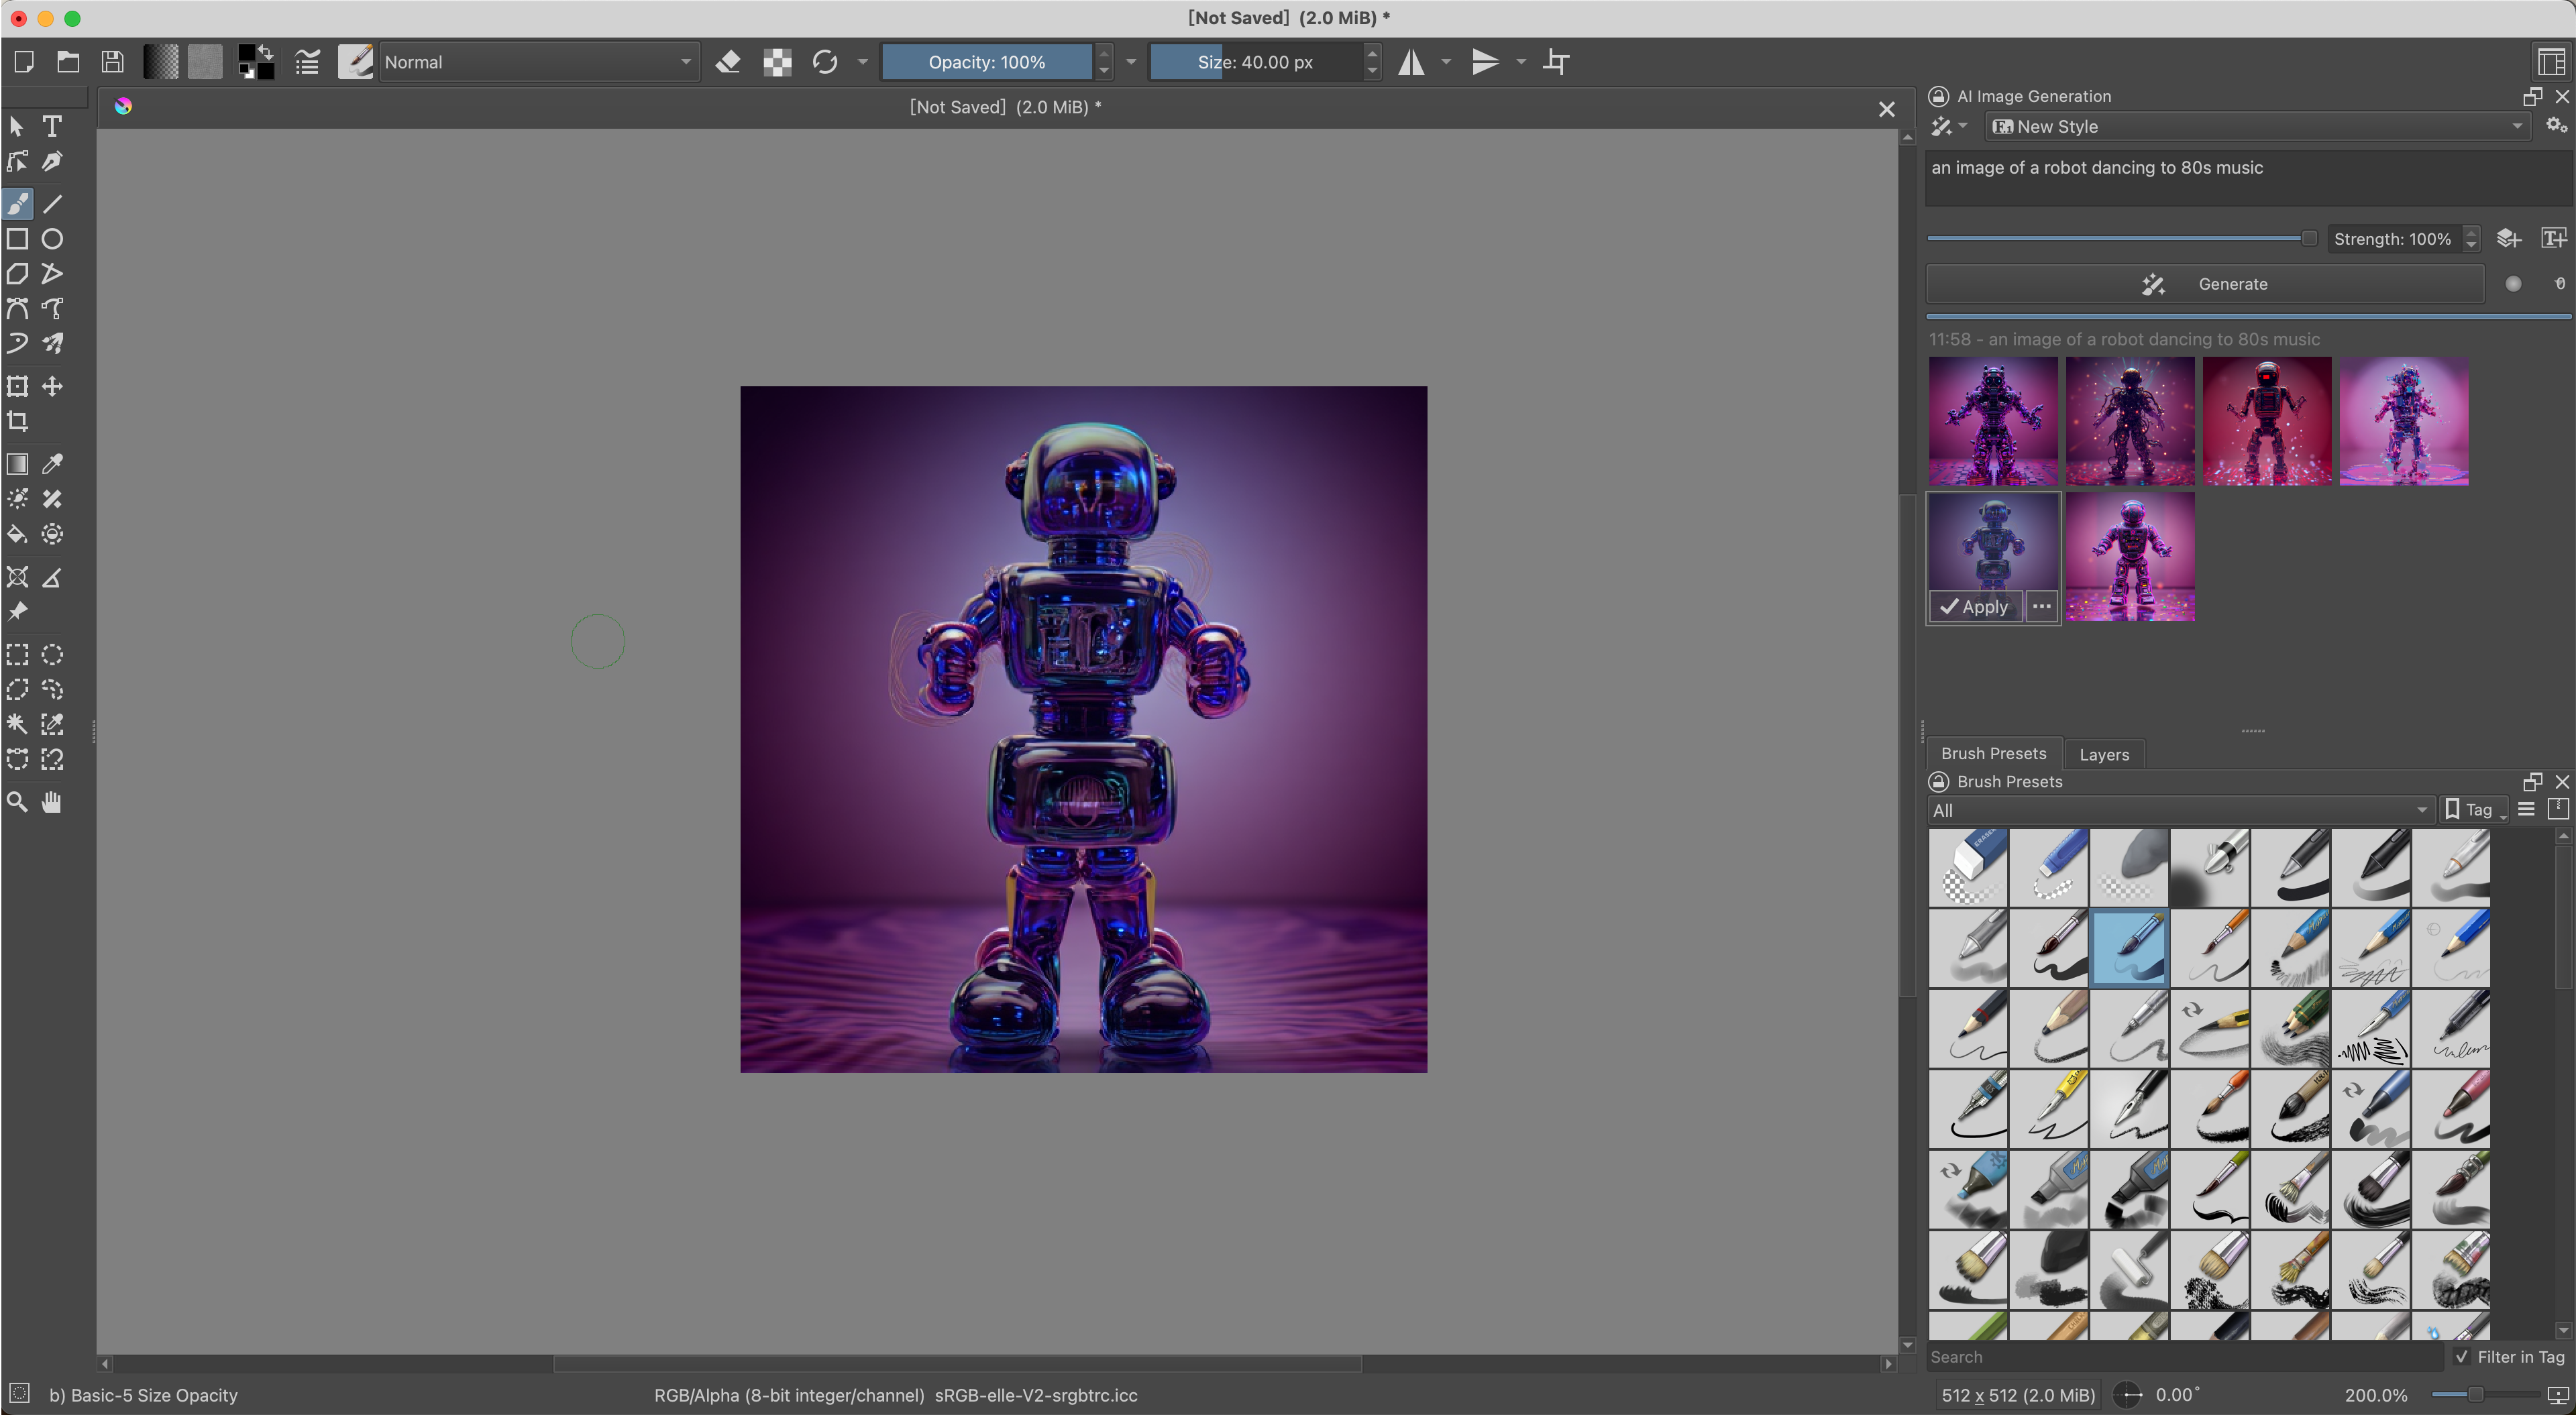
- Enter your prompts in the text box, and click Generate.
- Browse through the generated image variations.
- Select a preferred result, and click Apply to save it to the canvas.

TIP
If the results aren't quite what you want, you could:
- Create additional variations with new generations.
- Fine-tune the generation parameters.
- Refine your text prompt for more precise results.
- Experiment with different style settings.